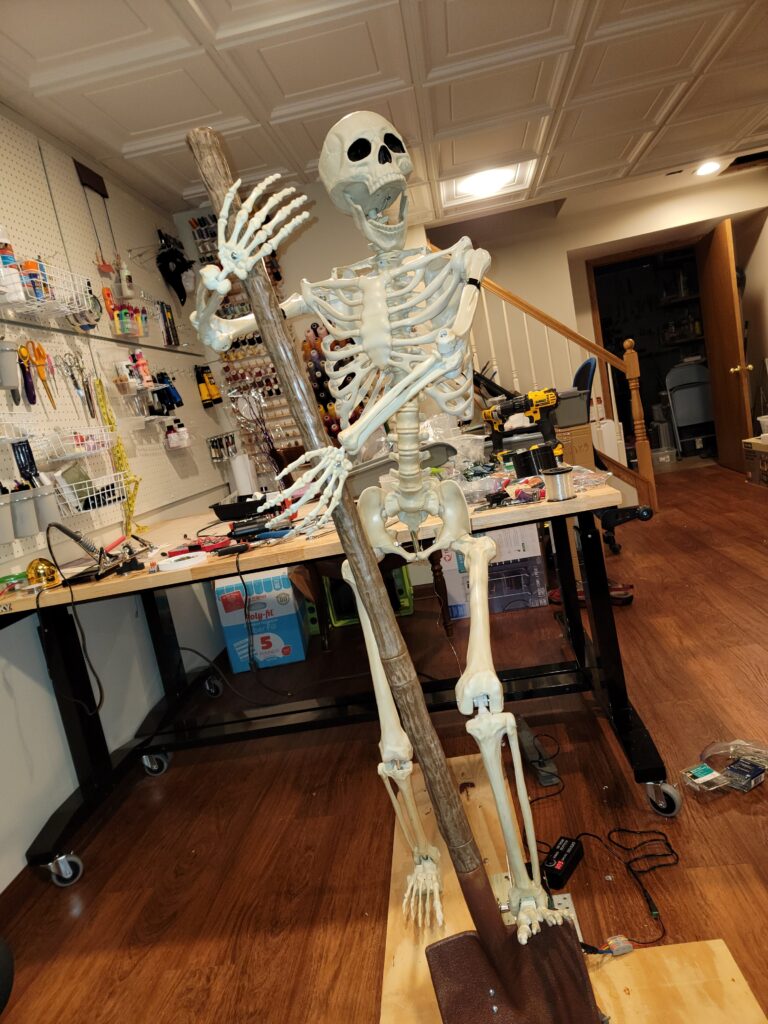
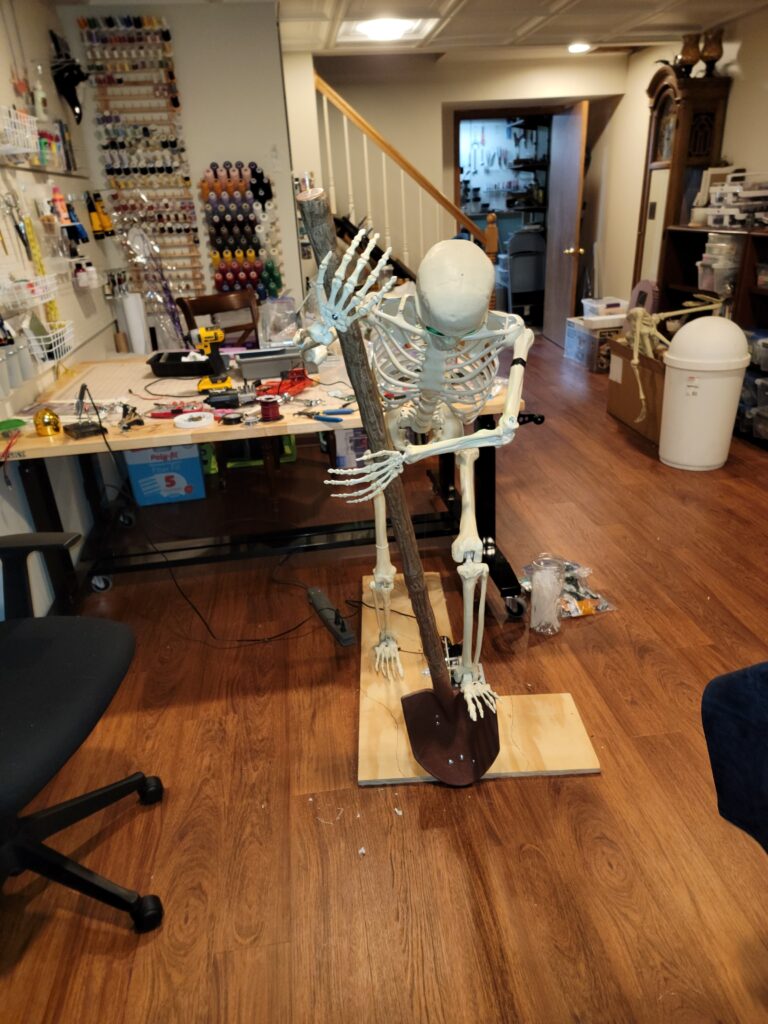
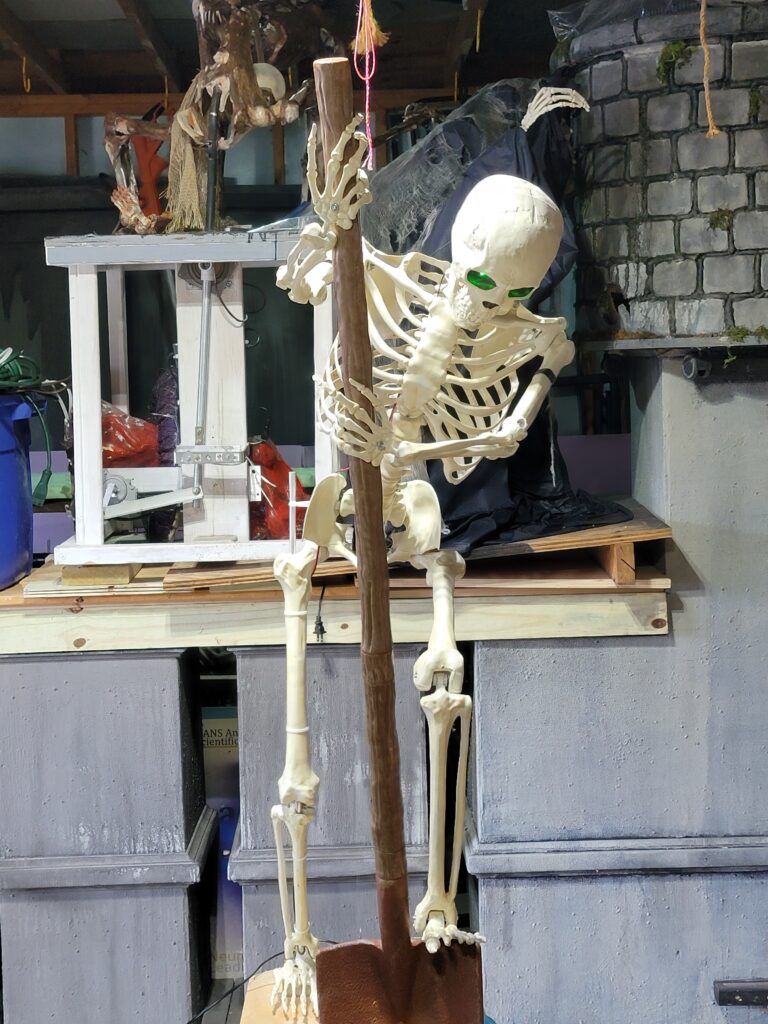
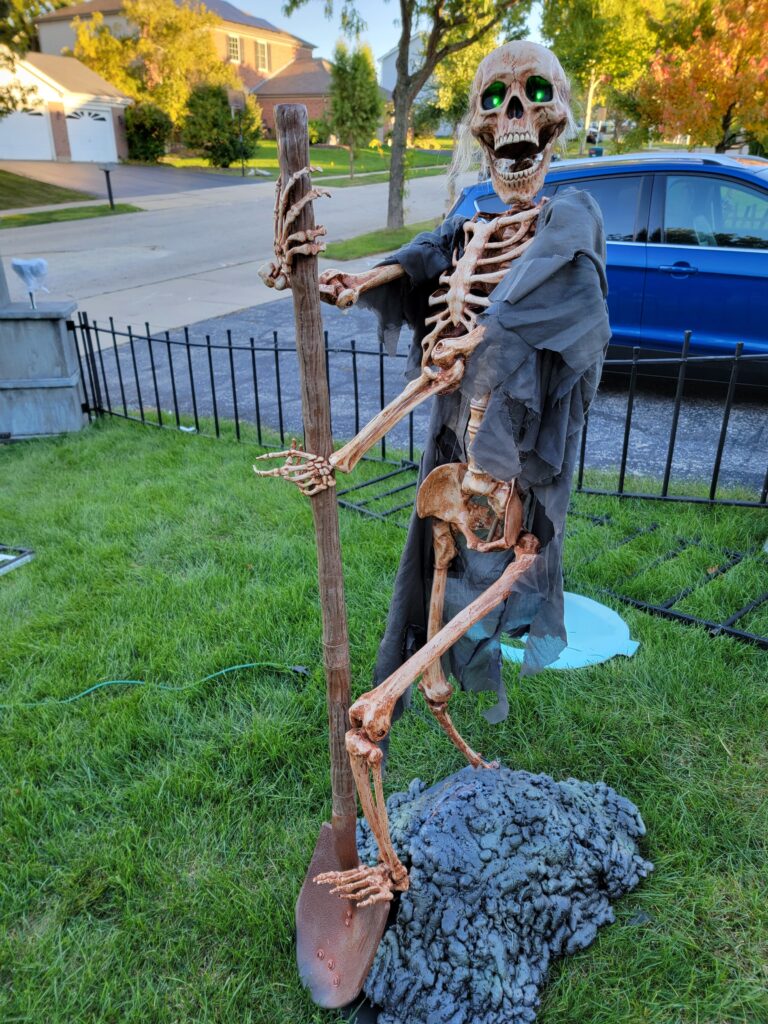
Morgan is our take on the combination of the haunted shovel and a grave digger figure. This was a tough build, and the pictures are going to make it look like it was easy to do. The truth is, that he had to be built from the ground up, and we had to repeatedly backtrack and make previous steps stronger, or more stable. There are hours of fine-tuning and retuning represented here. So, without further ado…
Note: If you want to make one of these, you need a sturdy skelly! There are some low-cost skeletons out there that have a great deal of flexibility. Morgan is based on one of these cheap skeletons. You can identify them be checking if the rib-cage is hollow and easily flexed. Another sign is the quality of the spine. Morgan’s spine was basically assembled with some wood screws! The soft, flexible plastic was a constant source of frustration as this build progressed.
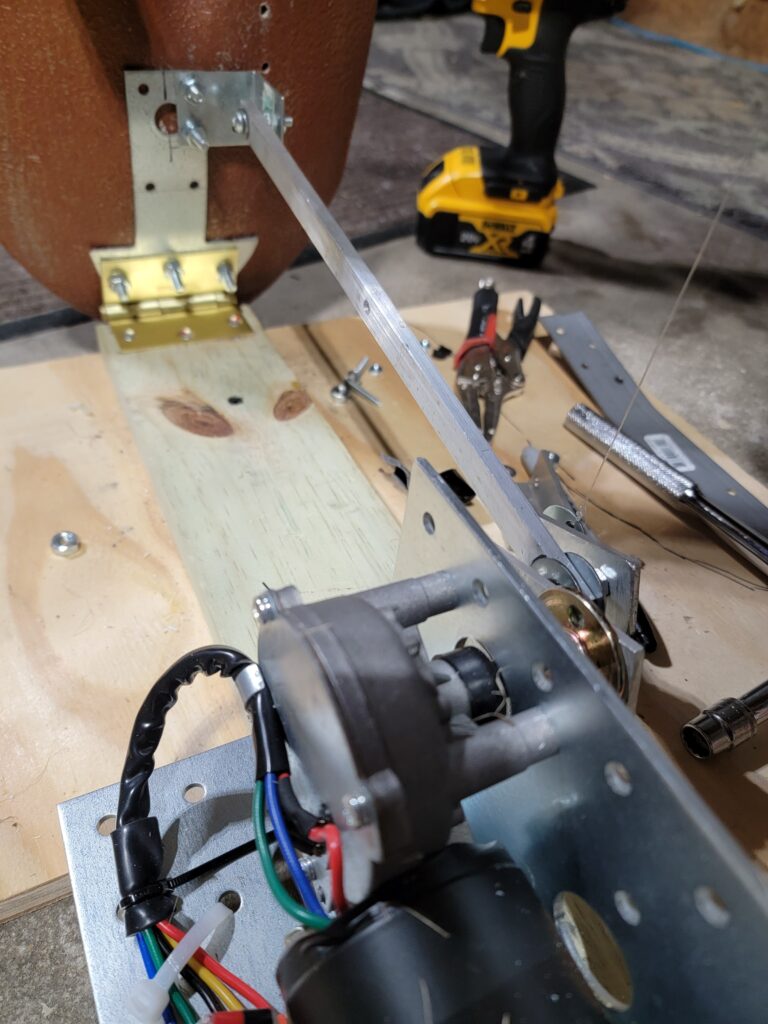
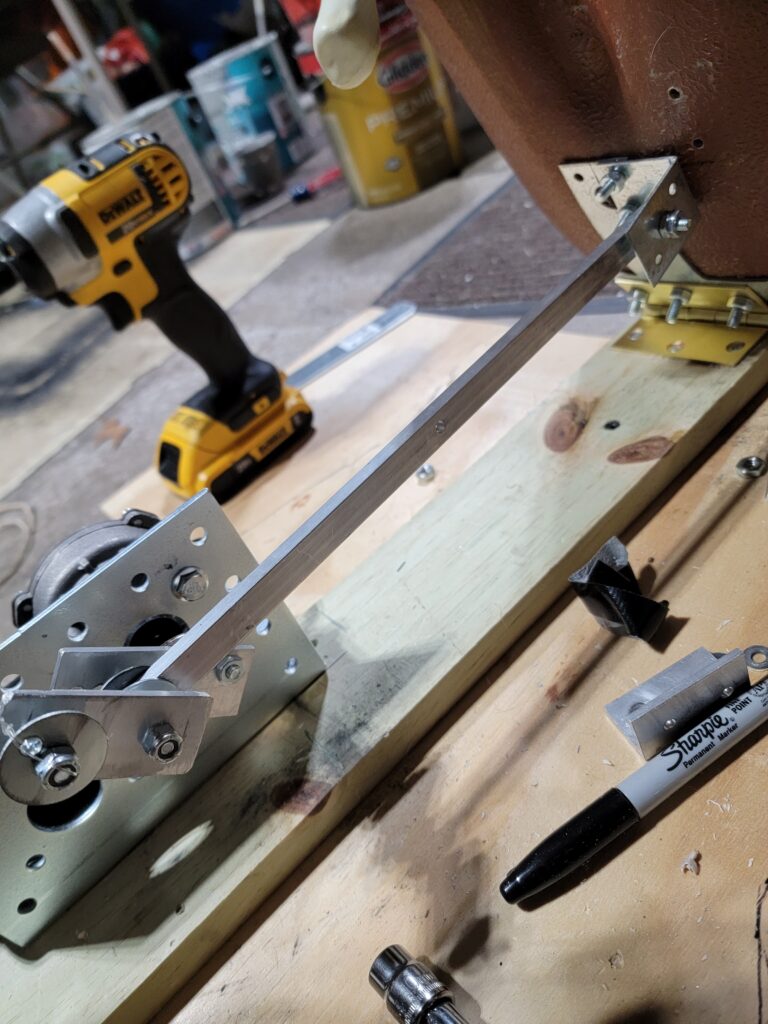
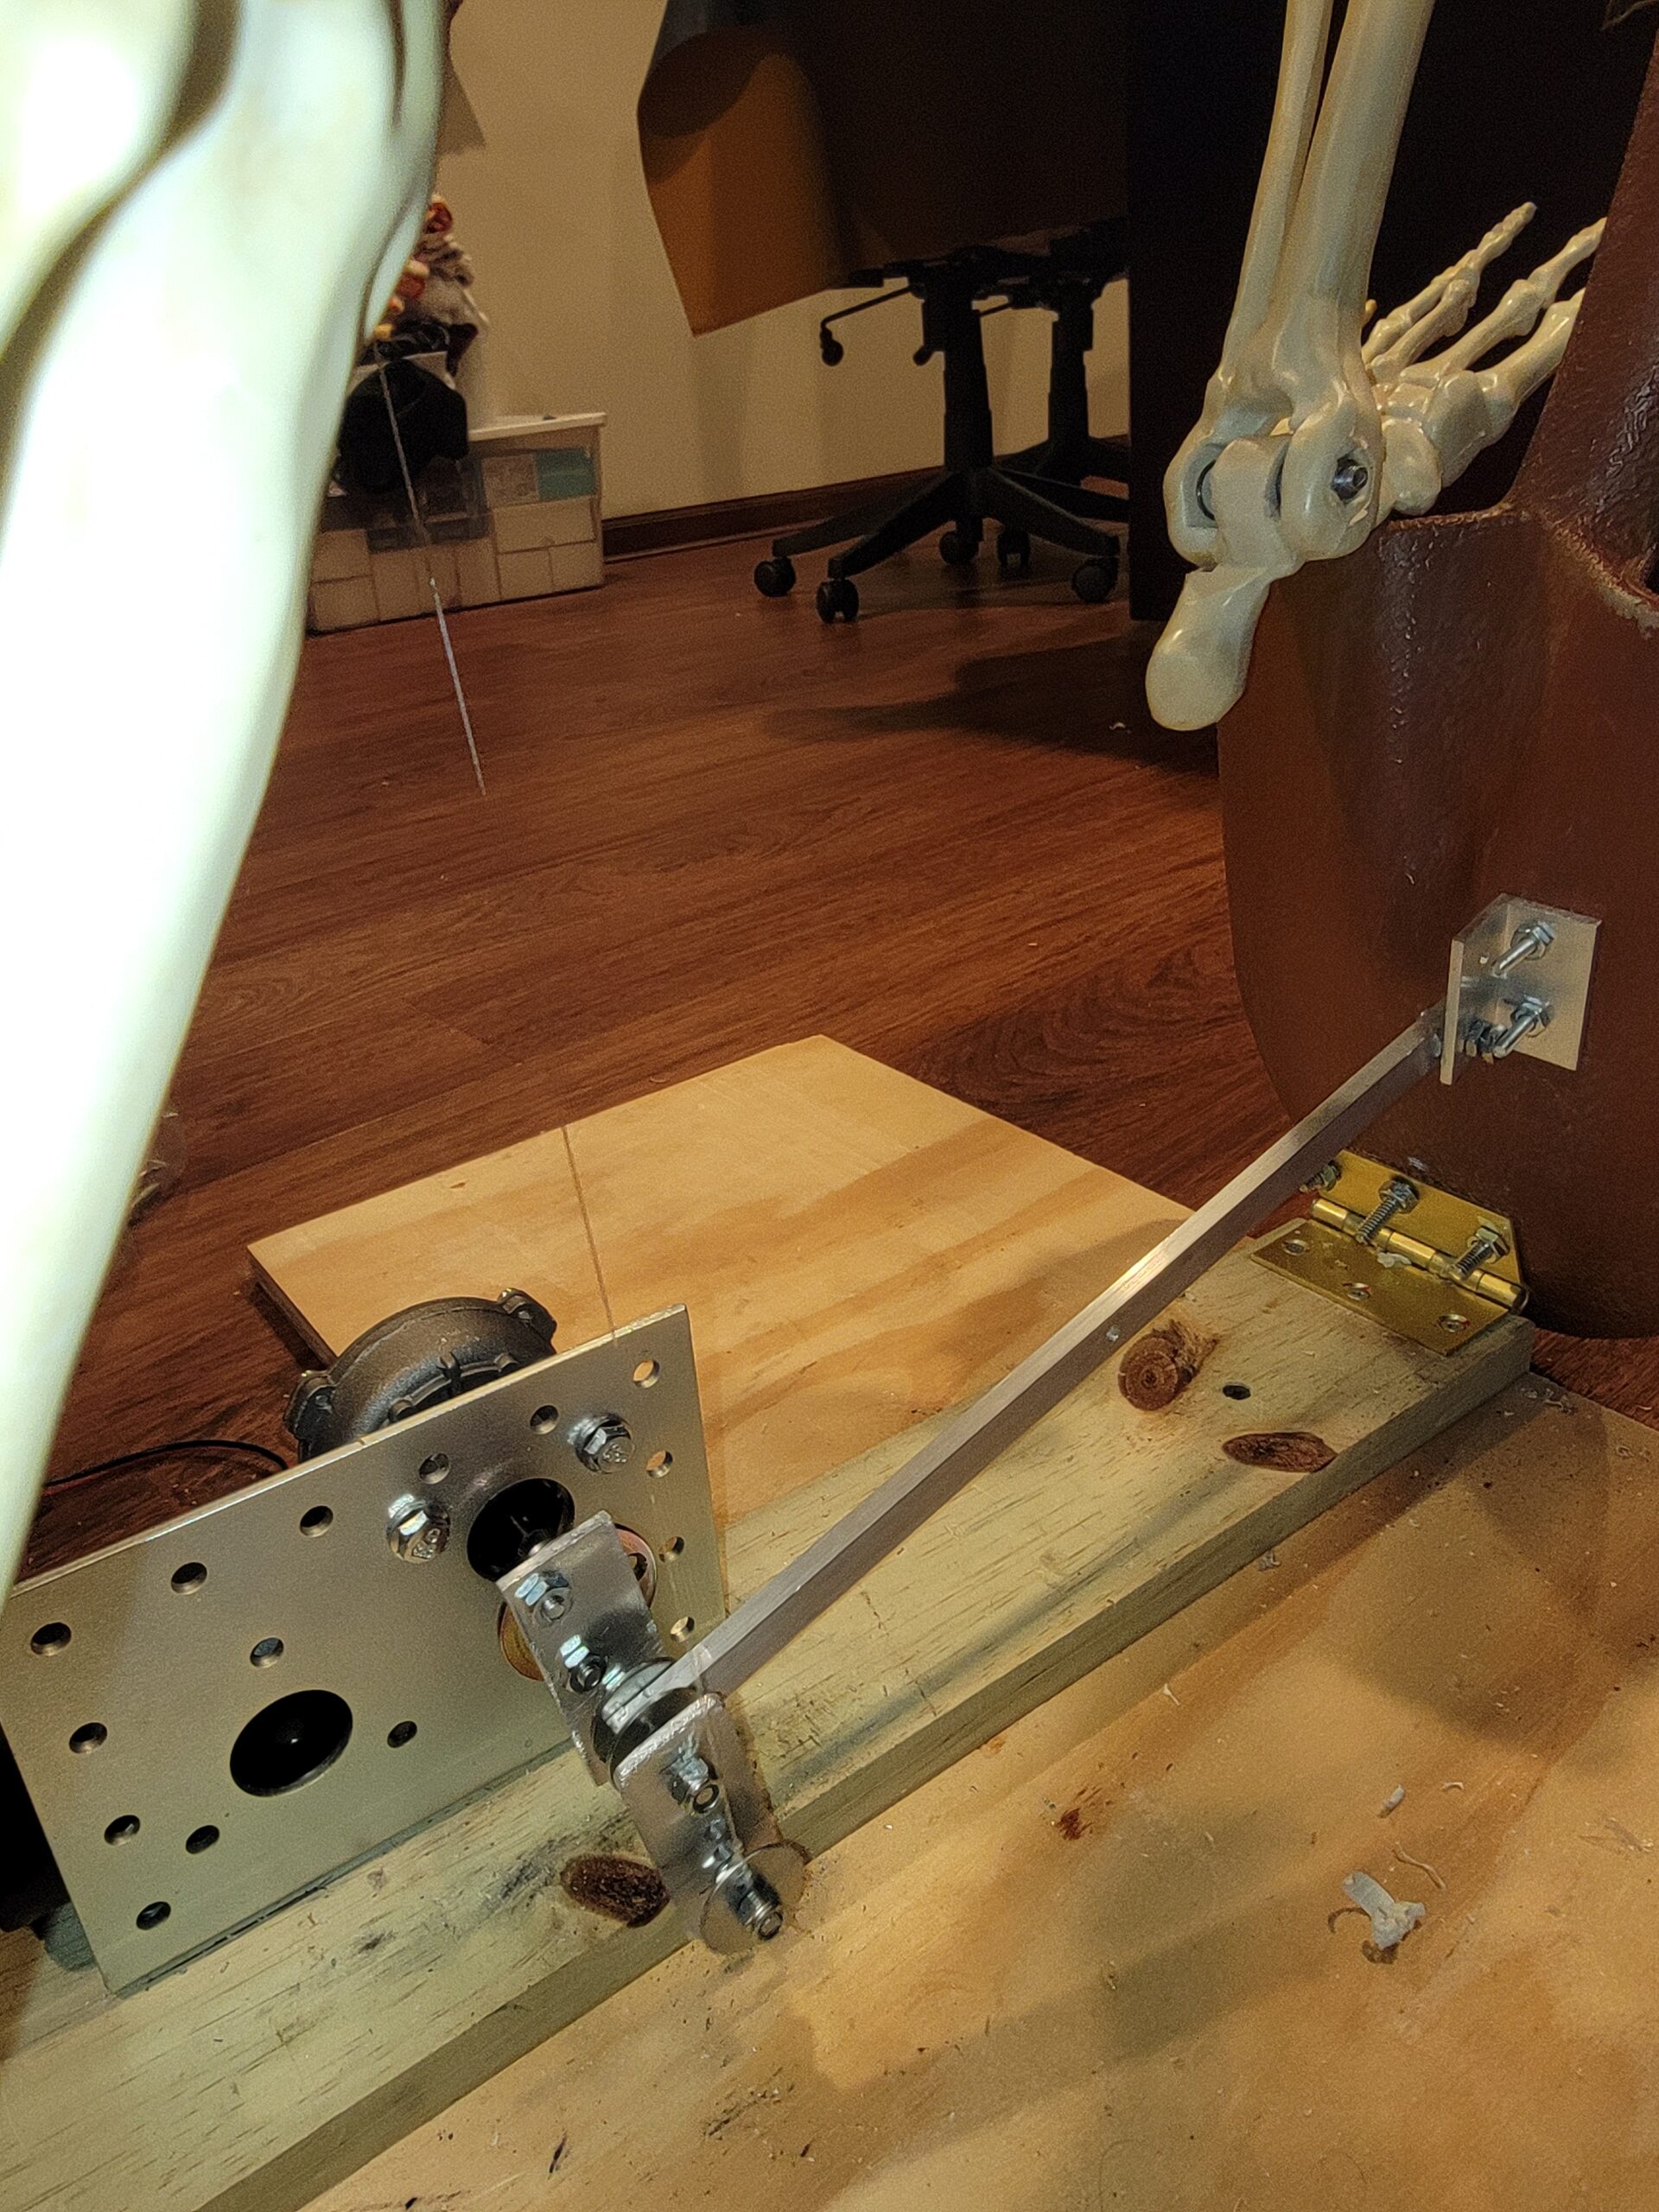
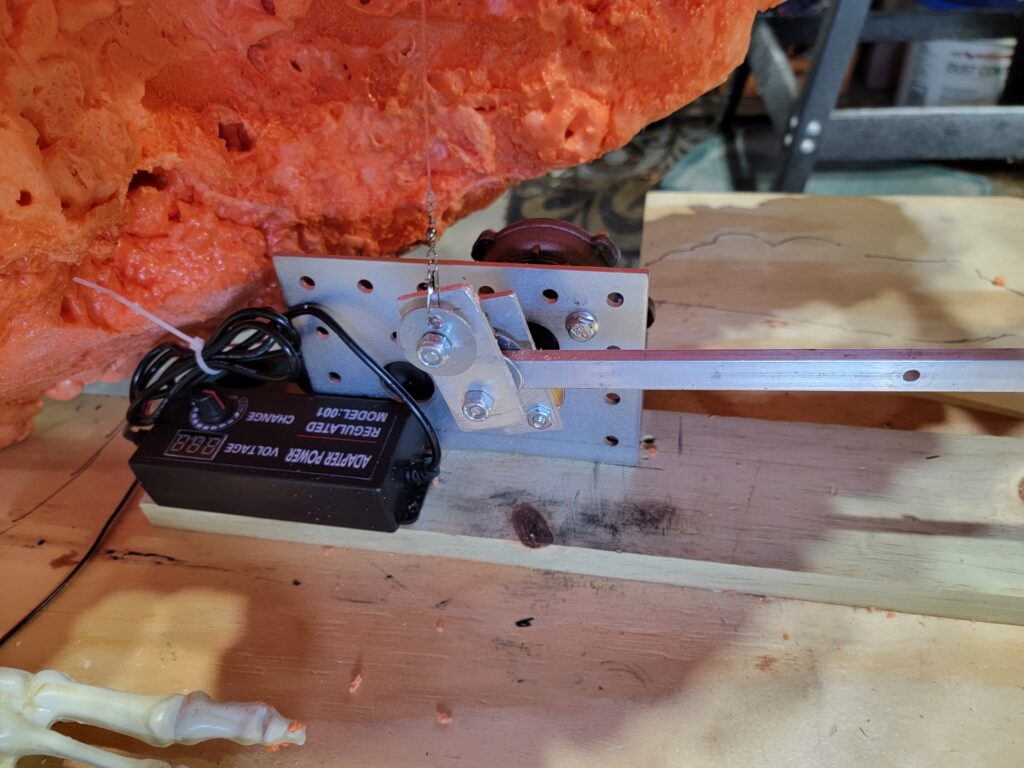
The Motor
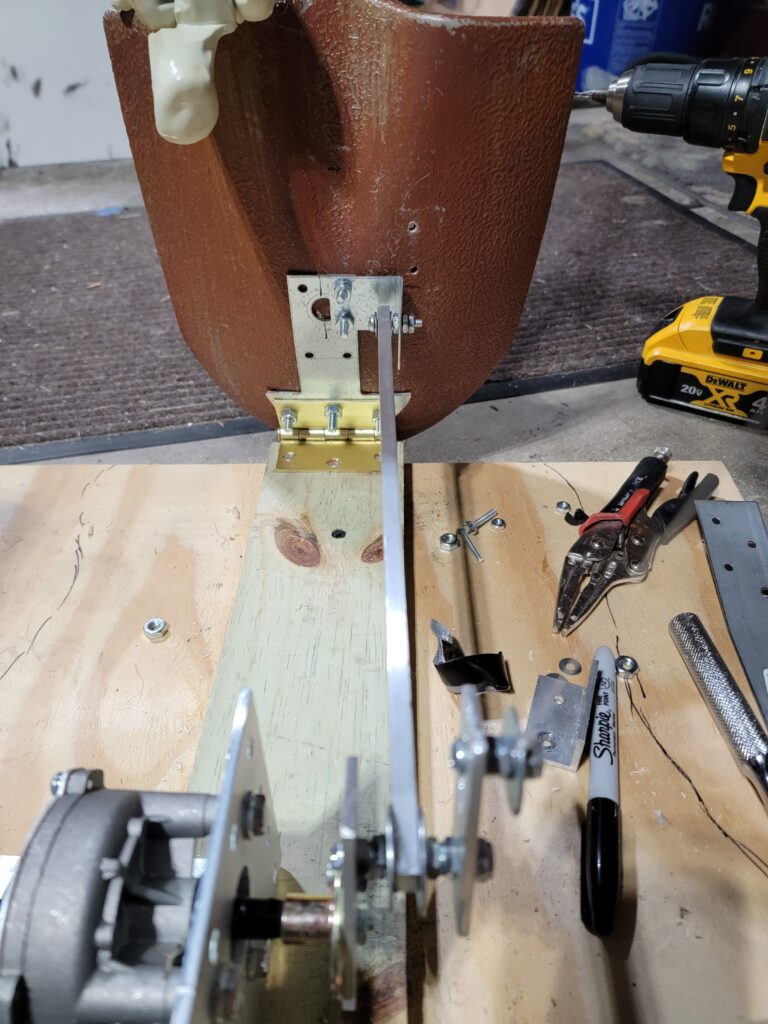
The motor is a standard fright-props wiper motor, mounted on the right-angle bracket, and running off a variable 3-12v power supply.

The Shovel
I first tried doing this with a real shovel. That was a lot of weight to contend with, and frankly I ruined two drill bits trying to get through the hardened steel of the shovel blade. In the end, we picked up a plastic shovel prop from Party City. The blade was easier to work with, but unfortunately, it introduced some flex in the shovel itself.
The key to any animated prop is controlling the variables of movement. The plastic shovel could bend. Bending is uncontrolled motion. Stop that!
The final version has the door hinge attached to a steel t-bracket, bent to follow the shovel blade contour. There is also a length of conduit inside the hollow plastic handle to give it a little more strength.


The Skeleton
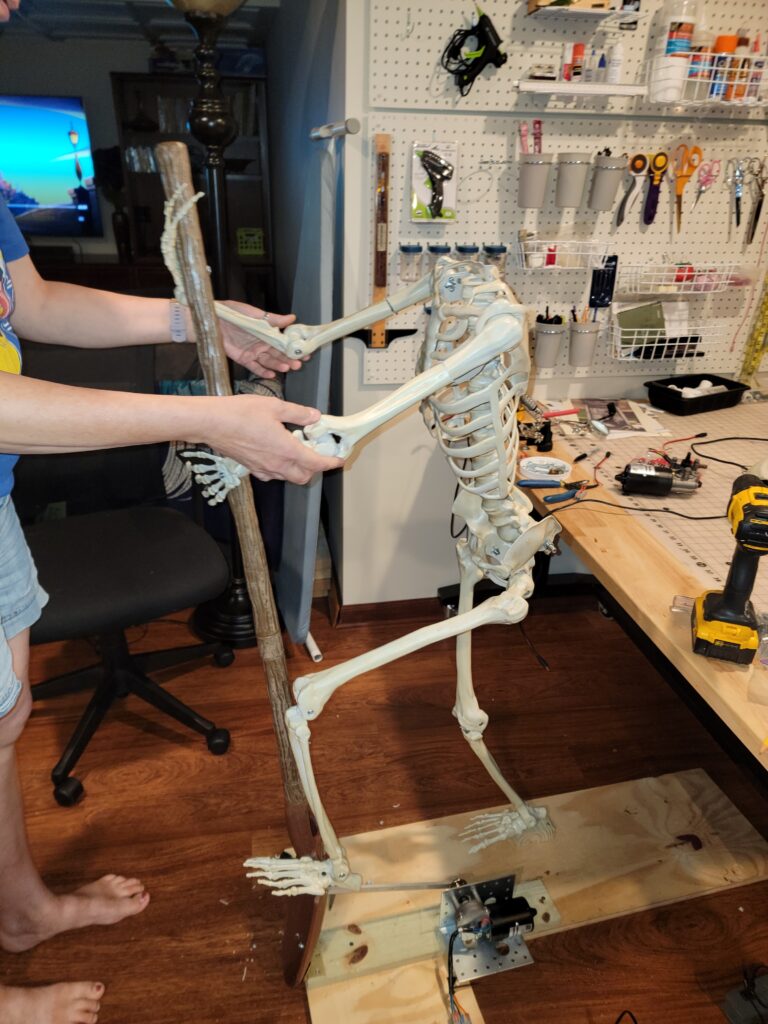
Morgan’s body is bendy. And I don’t like externally visible supports. I overcame this by running a 3/8″ aluminum rod up through the right leg, bending it at the knee, then running it up and out the top of the thigh-bone.
The tailbone assembly was removed from the pelvis, and drilled out so a 3/8″ threaded rod could pass in through the left side of the pelvis, through the tailbone, then out through the right side of the pelvis. There it was more or less attached to the aluminum rod for stability. This allows the figure to pivot forward and back from the pelvis.
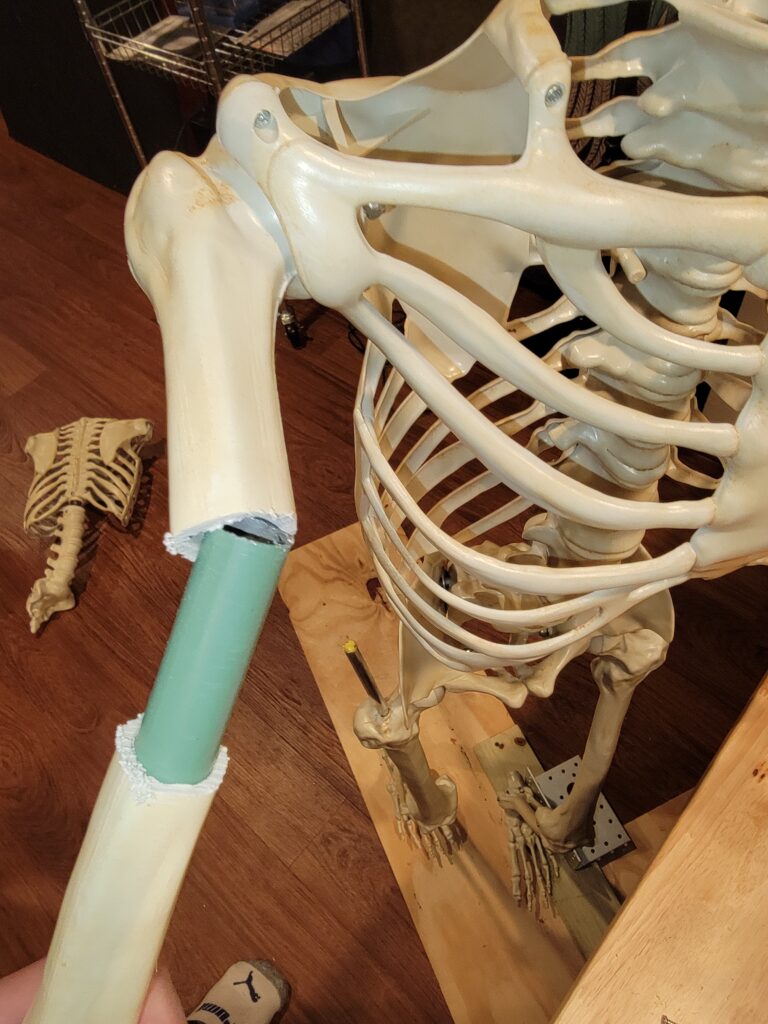
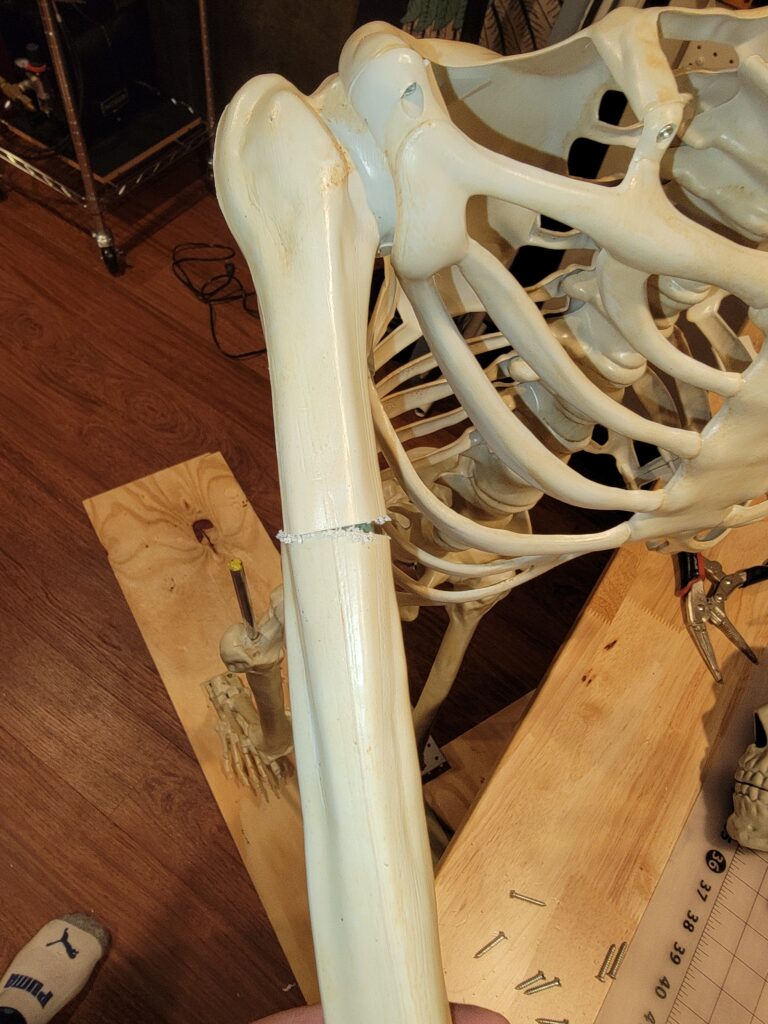
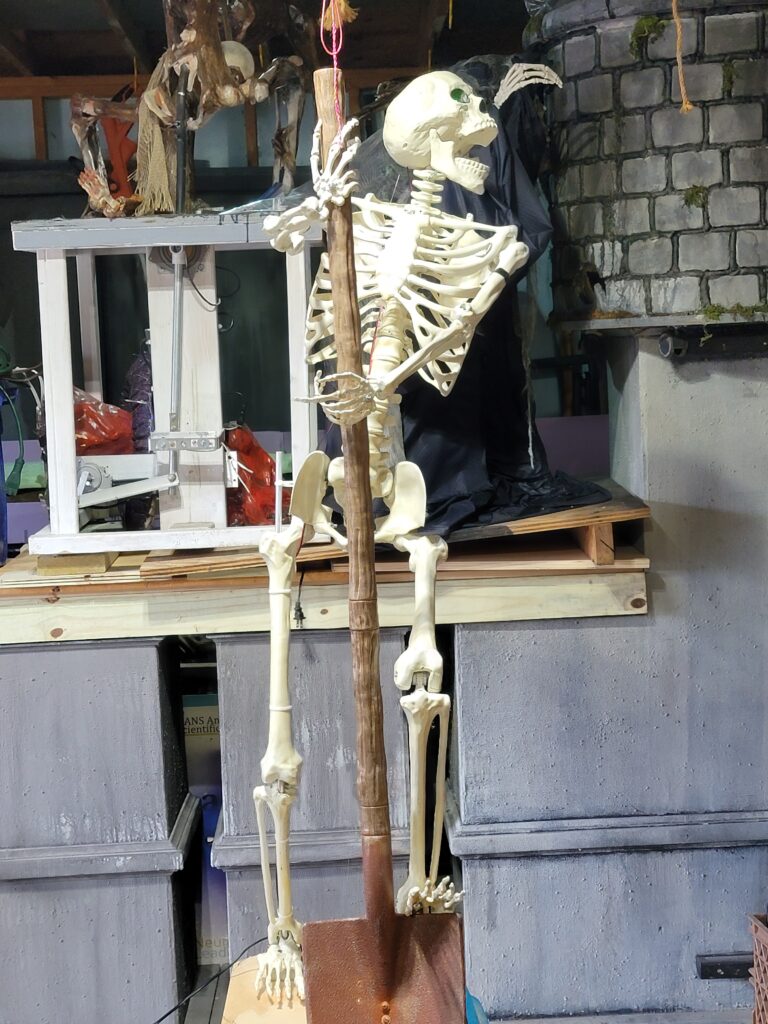
The elbows on pretty much any skeleton you buy are not set up to hold a shovel. Just look at your own arm when you grip a shovel, and you’ll see the elbow needs to rotate relative to the shoulder. I accomplished this by cutting the upper arm and shoving a length of conduit inside.
The right leg is modified for free movement in the hip and knee. It rests lightly atop the shovel, and thus provides ZERO support.
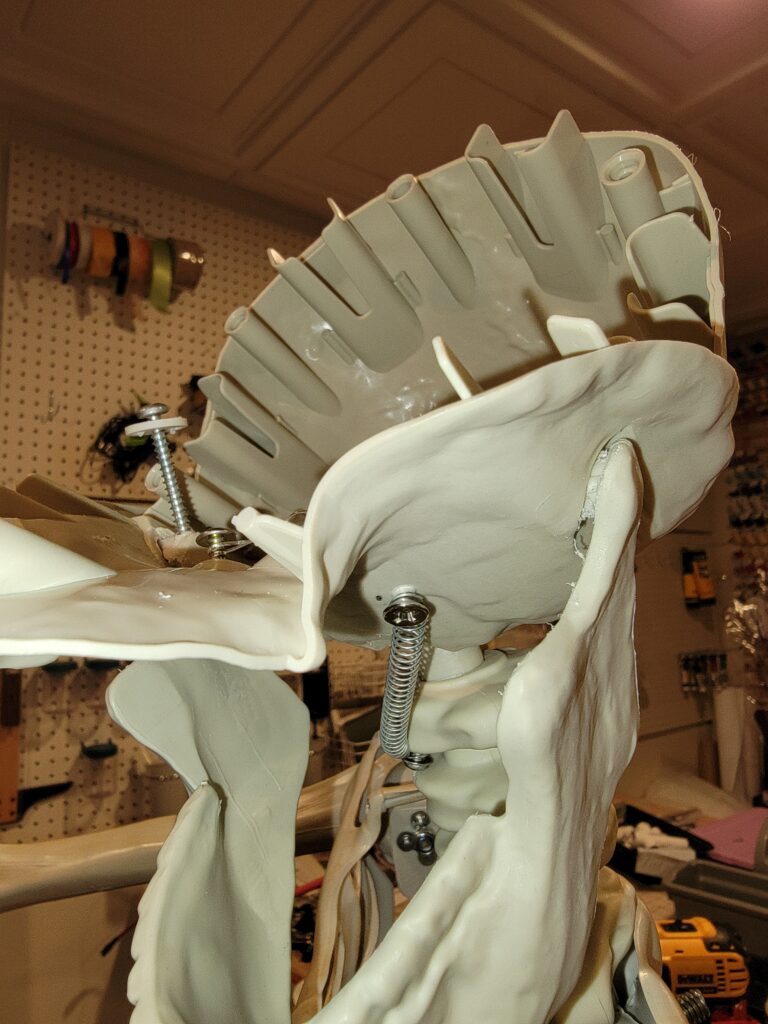
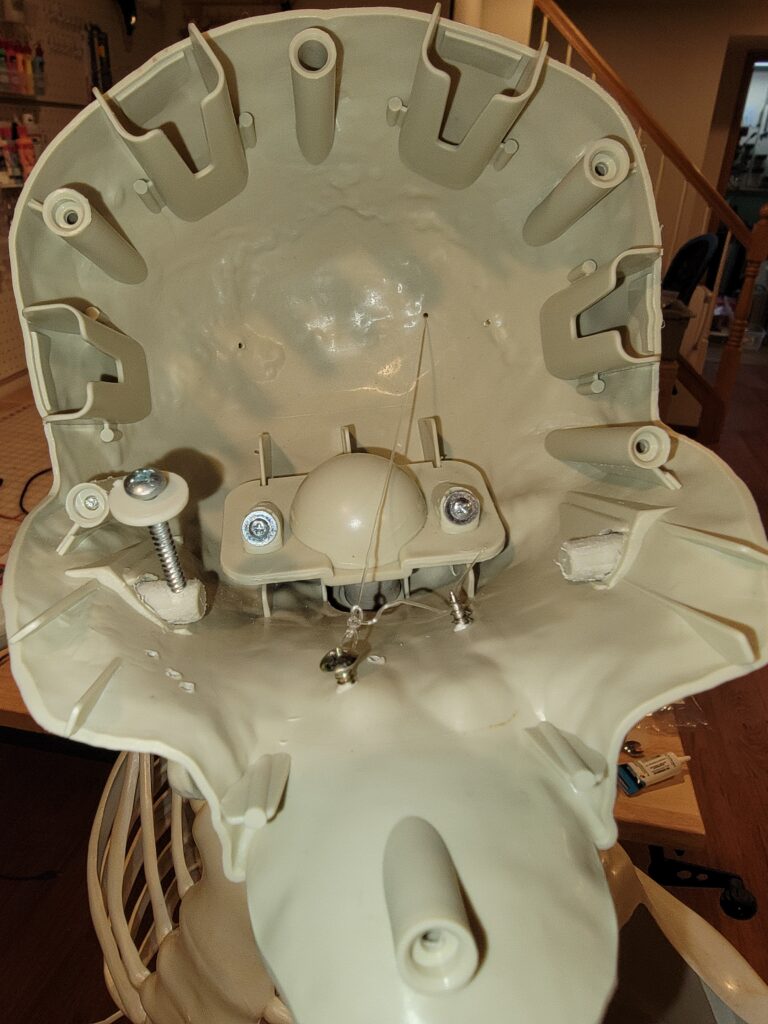
The Head Movement
Remember when I said the skelly sucked? The skull that came with this skeleton was completely sealed…effectively useless for getting inside and customizing. I swapped his skull with one from the Party City skelly with the ball-joint for the neck. Not only is it possible to get free movement of the skull on the top of the neck, but the jaw can be modified to open and close freely!
Morgan’s unique head movement is caused by a combination of two opposing forces. A spring under the chin that will pull the head back to center, and a fish-line at the back of the head that will pull it into a turn to the left. If you pull the string to the right, the head turns left. When you release the string, the spring pulls the head back to center. The string doesn’t just pull to the right, it also pulls down, which causes the head to look up.
The jaw and head motion are freely moving, and position themselves based on head inclination.
Movement Tests
The first of many movement studies. The entire prop is driven by the movement of the shovel. If the shovel moves too far, the skeleton will pitch too far forward, or lean too far back. I wound up drilling a bunch of holes 1/4″ apart on the driver bar, and just moved it back and forth on the motor mount until it gave the right amount of motion to keep Morgan from flopping over.

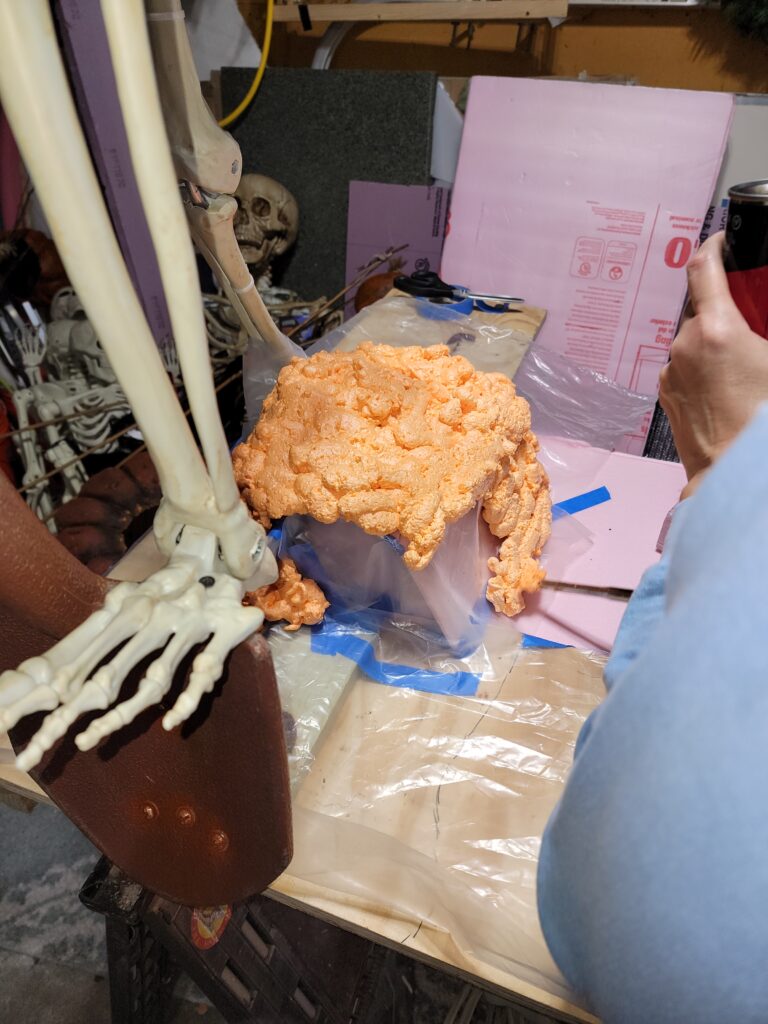
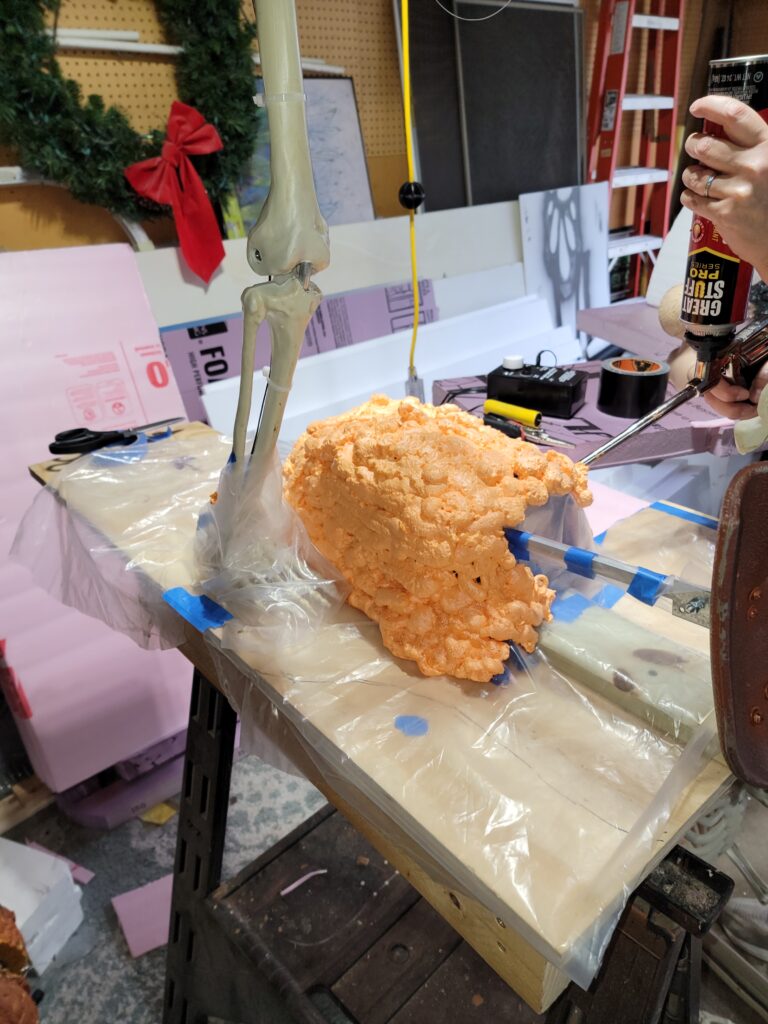
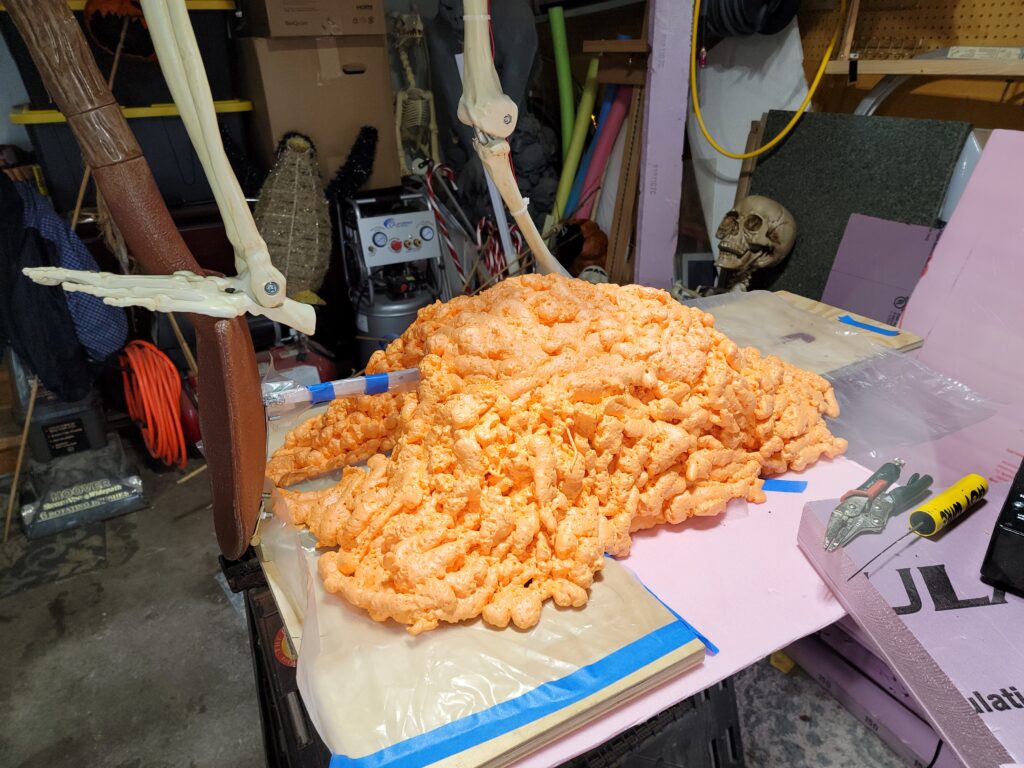
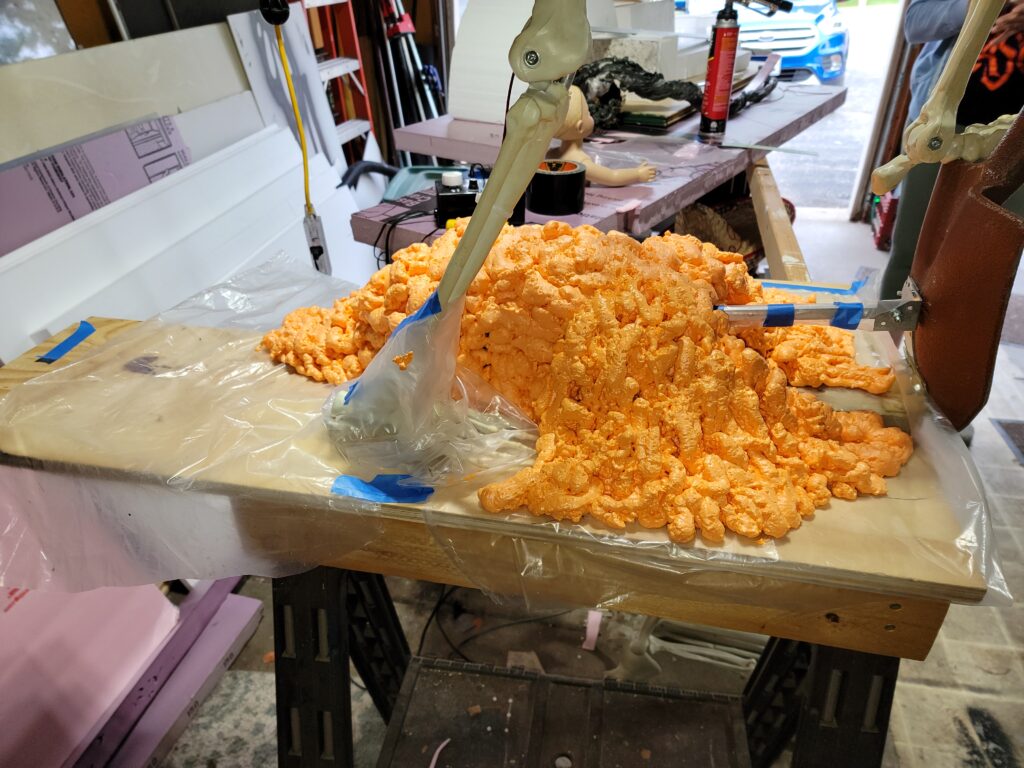
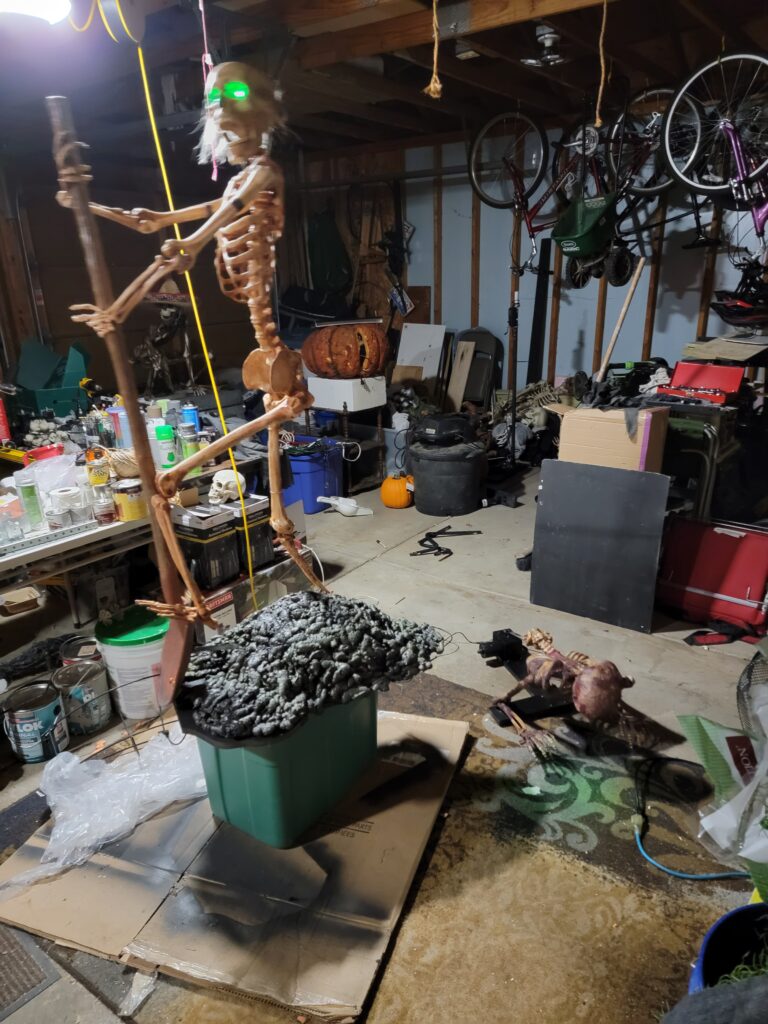
Concealing the Motor
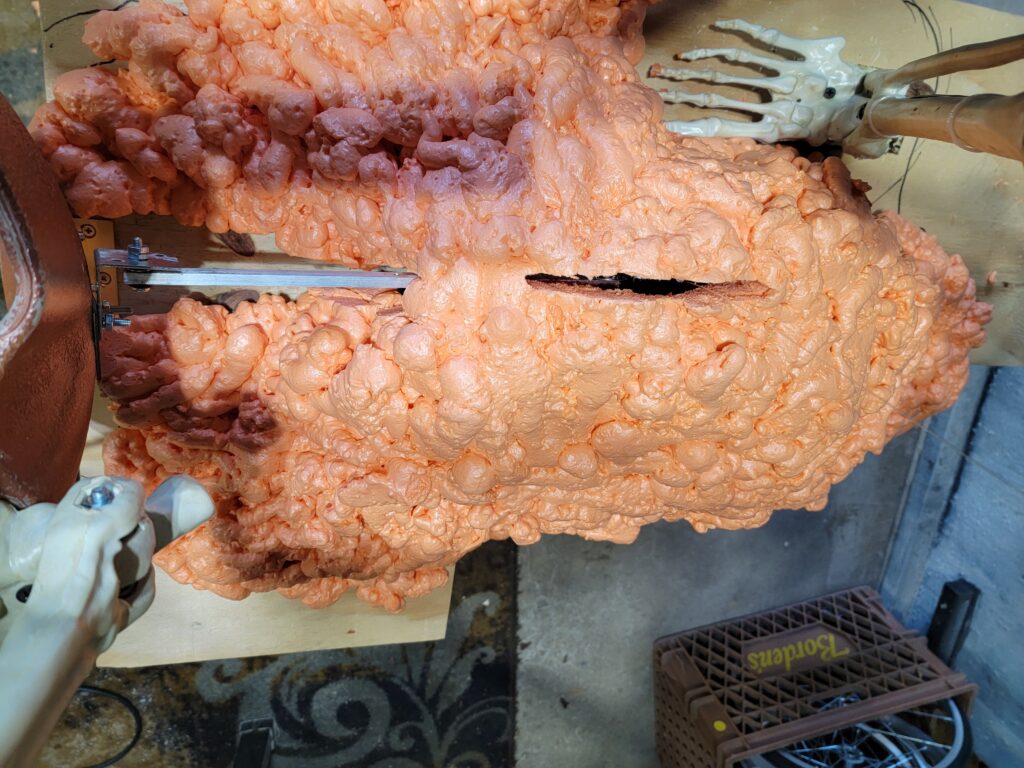
We want to hide the motor, and we want to protect the power supply from rain. So, we’ll build a pile of “dirt” using spray-foam.
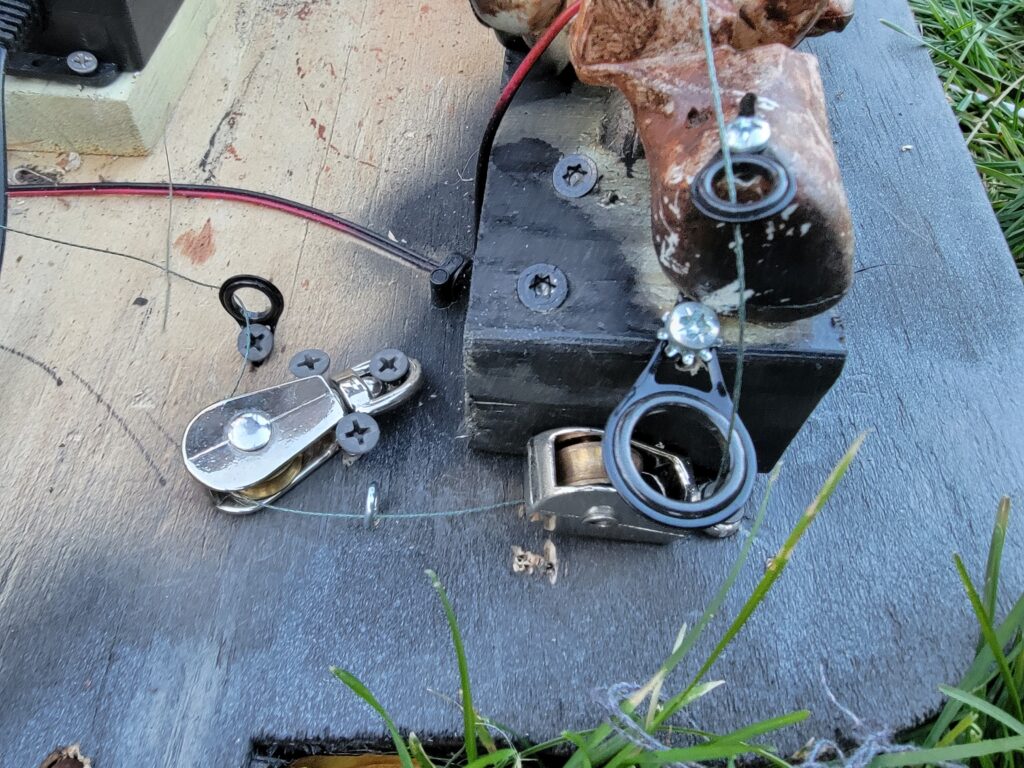
Re-Routing the Fish Line
Once we got the skeleton moving, then next step was to fine-tune the fishline placement to animate the head. At first we had the line running straight down to the motor. This had the side effect of PULLING him down to the left (again, the flexing of the skeleton was a problem).The answer we used was to run the line down the right leg, and come at the motor from behind instead of above. This introduced another problem. The longer fishline run had too many twists and turns to use Monofilament for. We switched to high-test (80#) braided line. Braided fish line doesn’t stretch, but it can fray if put through too much friction. I had to replace all the simple eyes with ceramic fishing pole guides to reduce friction. And to tell you the truth, the jury is still out on the longevity of this solution. There’s a fairly good chance I’ll be replacing that fishline every couple of days.
Time for a Make-over
Up until now, everything about Morgan has involved structure and movement. But he wasn’t camera-ready yet. It’s time to turn him over to my wife, Rebecca to dress him up…


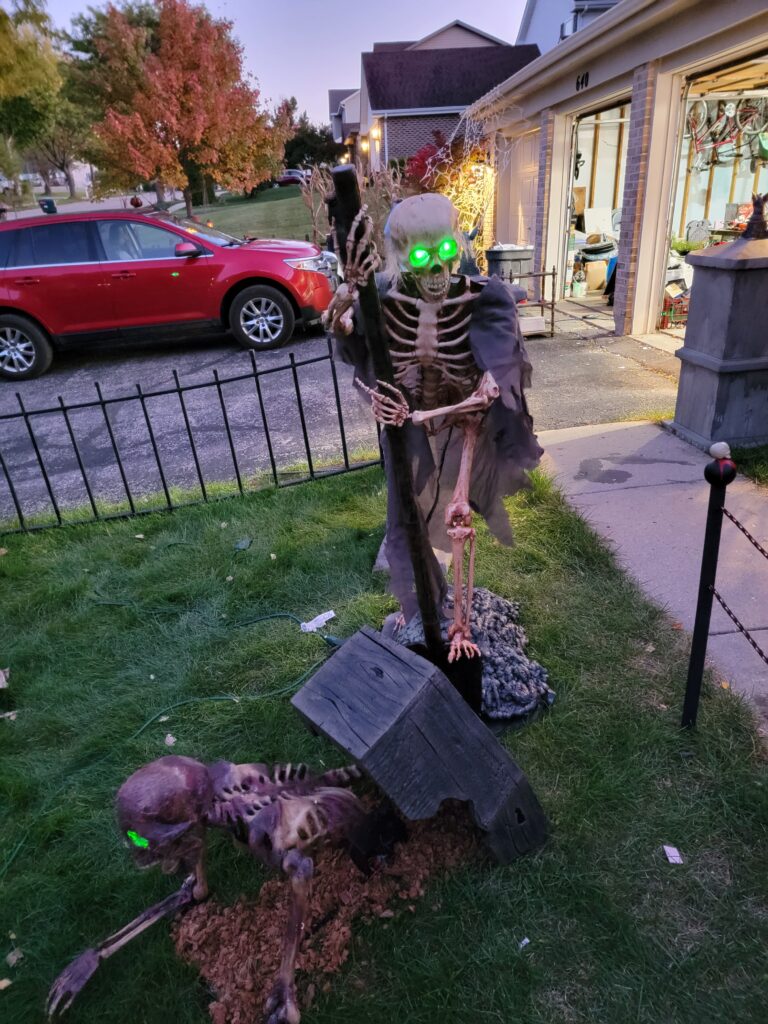
Re-Re-Routing the Fish Line
I hate it when I’m right. The fish line was snapping pretty much every day. The prop still ran, but his head stayed down, looking forward with is jaw tucked into his chest.
Bleh.
The problem is the right angle turns the string took at the heel and under the dirt pile, on its way to the motor. A trip to the hardware store for a couple pulleys, and a expletive-laced quick modification as the sun dipped lower, and the first of our evening’s observers started to arrive…
Let’s see how long it lasts this time…