
Everyone seems to be doing variations on the watchman prop this year. I saw some pictures of the mechanism and decided to document making one myself.
I’ve built two so far, so the pictures below are first from the prototype, and then from the “tighter” Mark 2, and then the stronger Mark 3.
Mark 1 Prototype
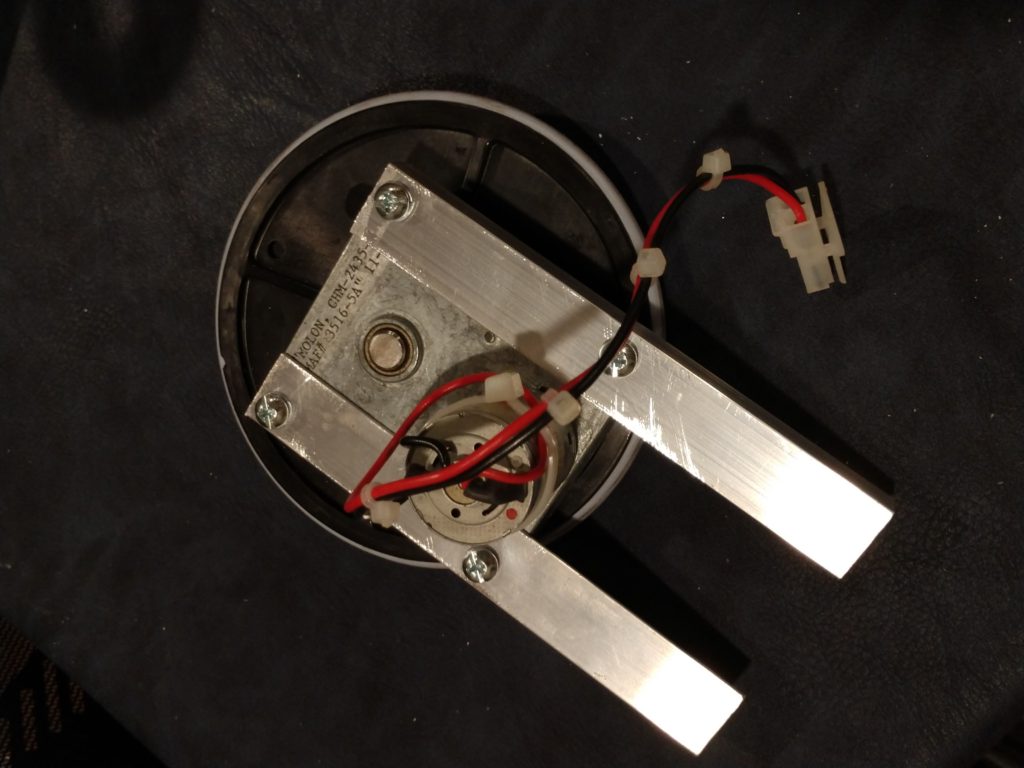
I forgot to take any pictures before I was halfway through the prototype.
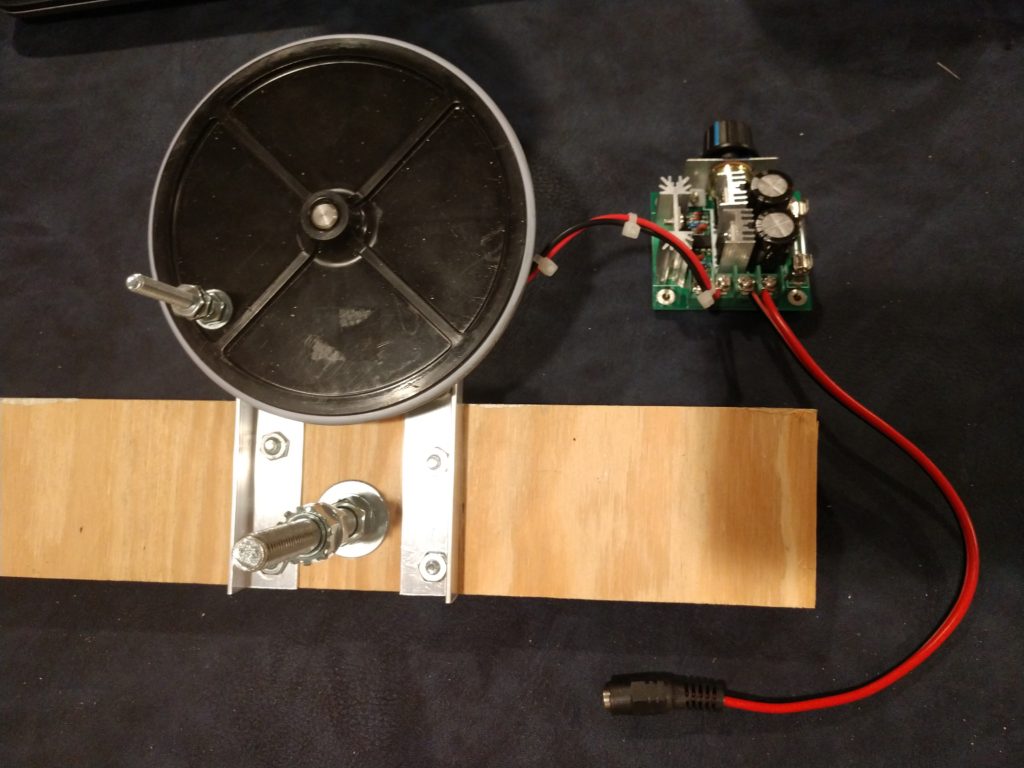

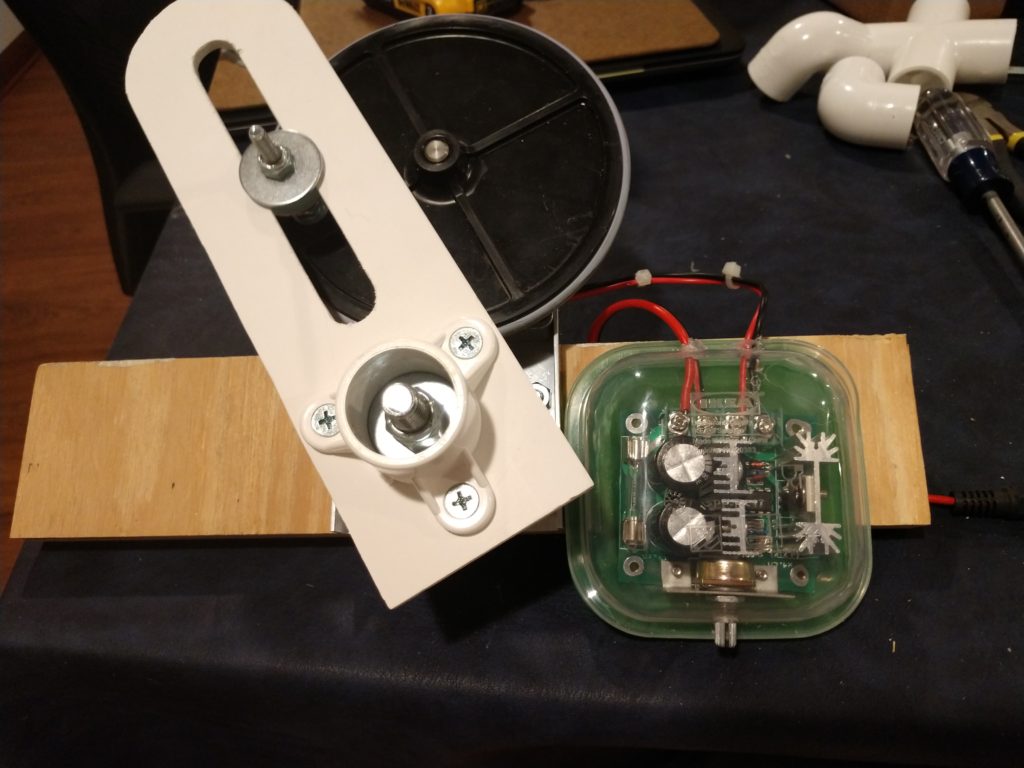
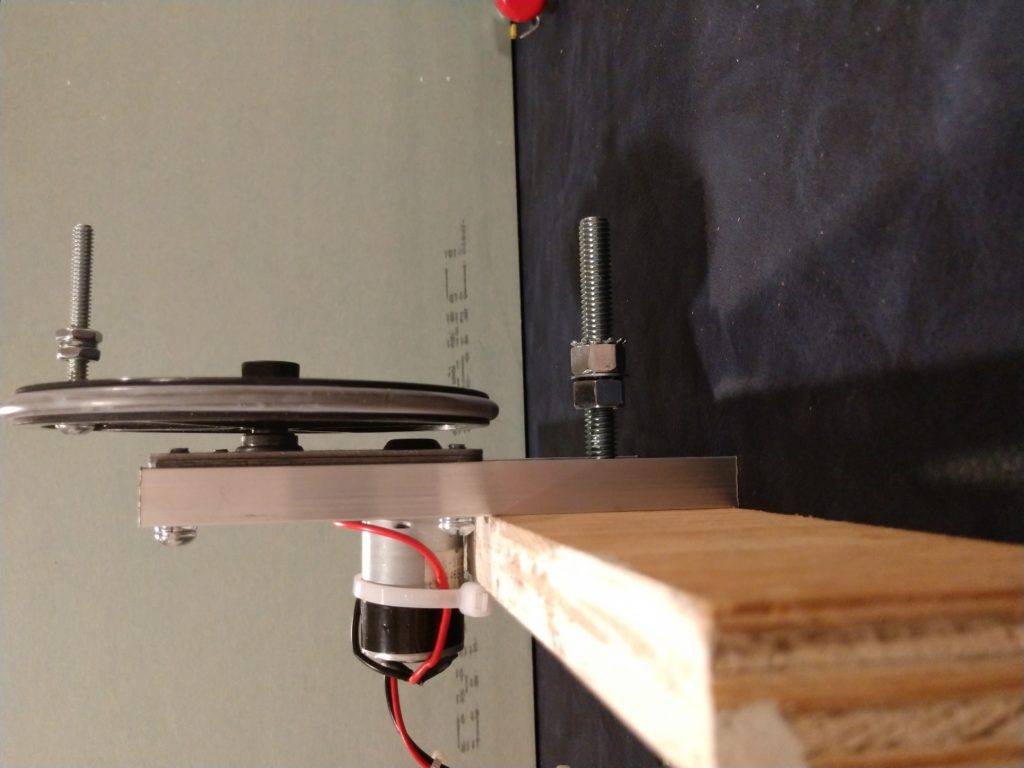
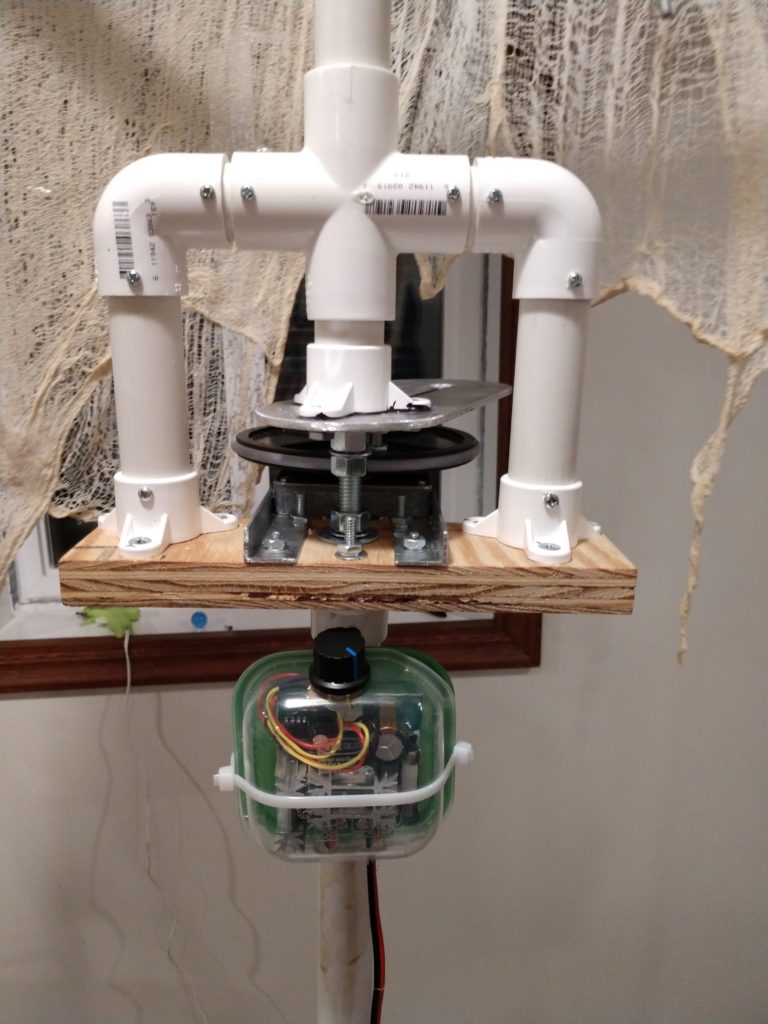
This first one will turn a prop that is sitting on the ground, so I’m not worrying about what happens beneath the plywood (too much). There is a nice shot here of my enclosure for the PWM module. It’s a little IKEA food-saver container from the PRUTA line. It’s the perfect size for the module (which luckily never gets hot) with this motor.
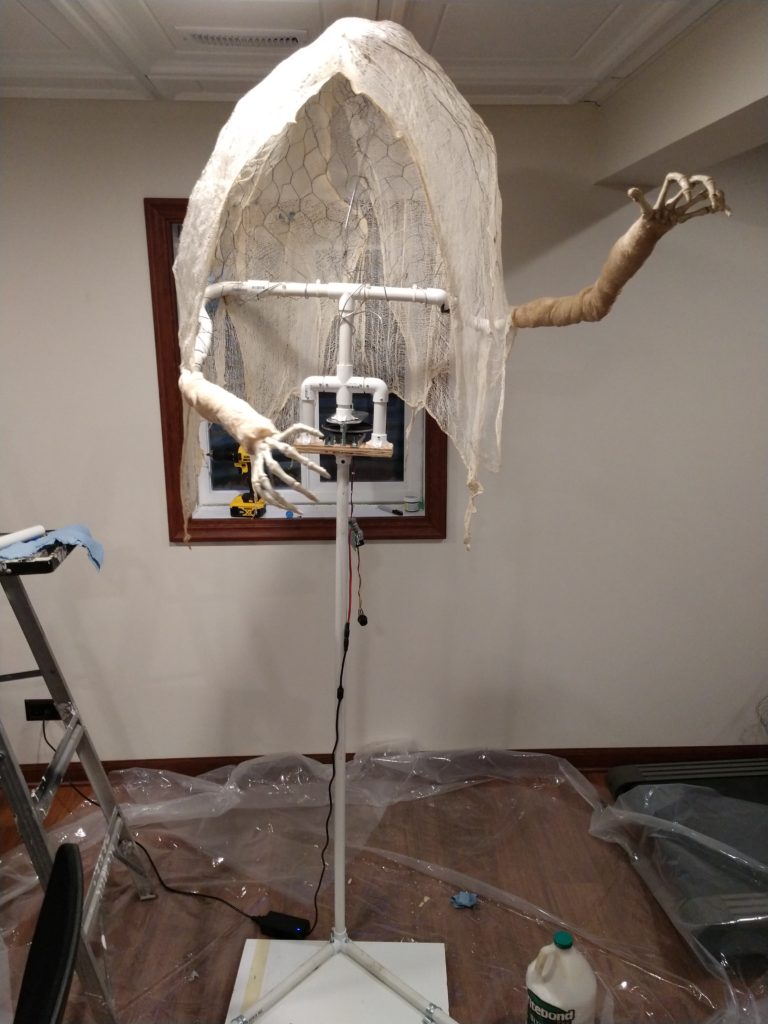
Mark 2 – Inline Model
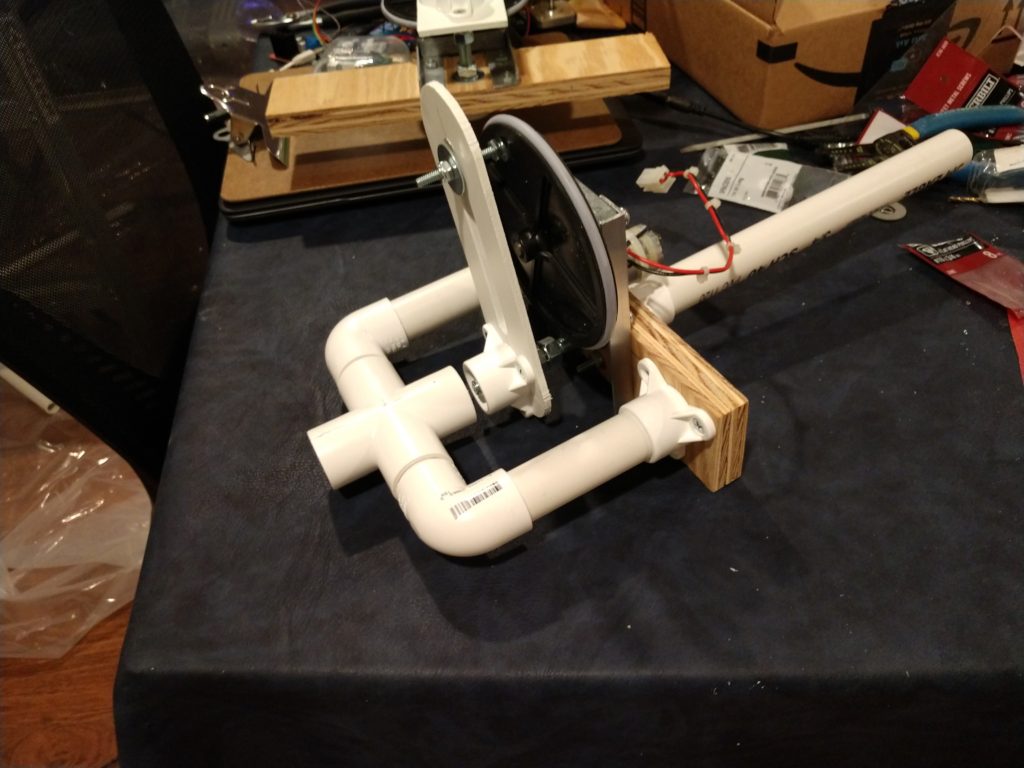
Bolstered by the success of the prototype, and anxious to improve on the design, I started right in on the second one. The primary differences in the Mark 2 are the placement of the 3/8″ carriage bolt (the control arm pivot), the shape of the control arm, the incorporation of a superstructure over the top mount, and the inclusion of a mounting point beneath. This model can be popped in the middle of any span of 3/4″ PVC to introduce the pivot action in-line.
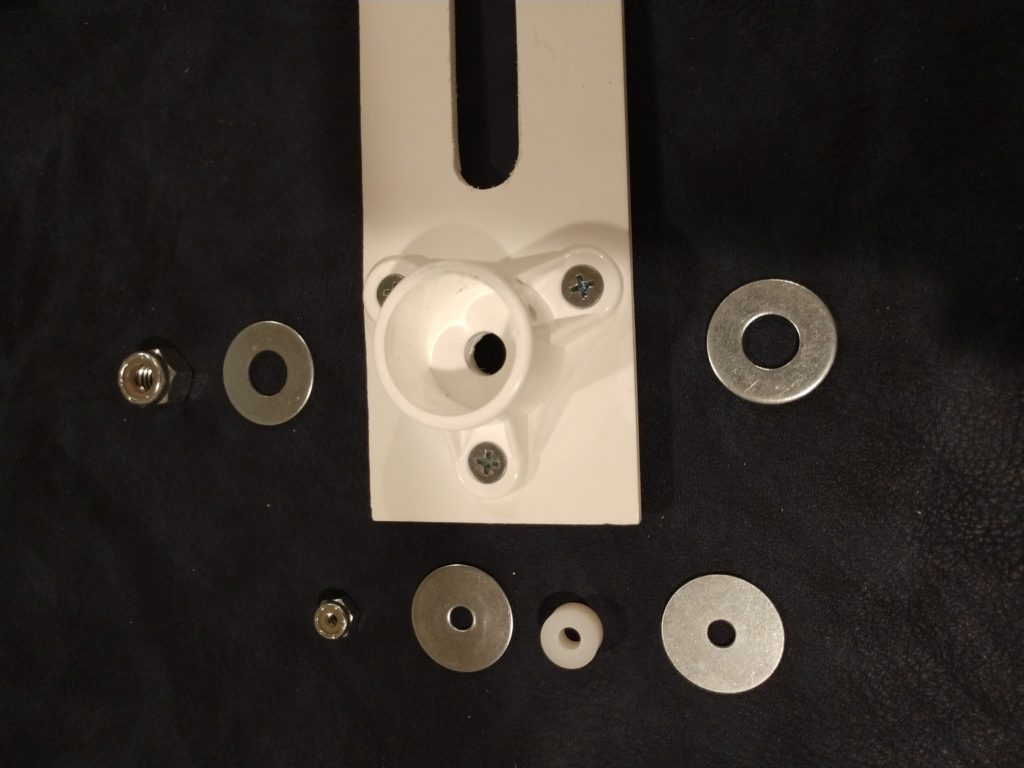
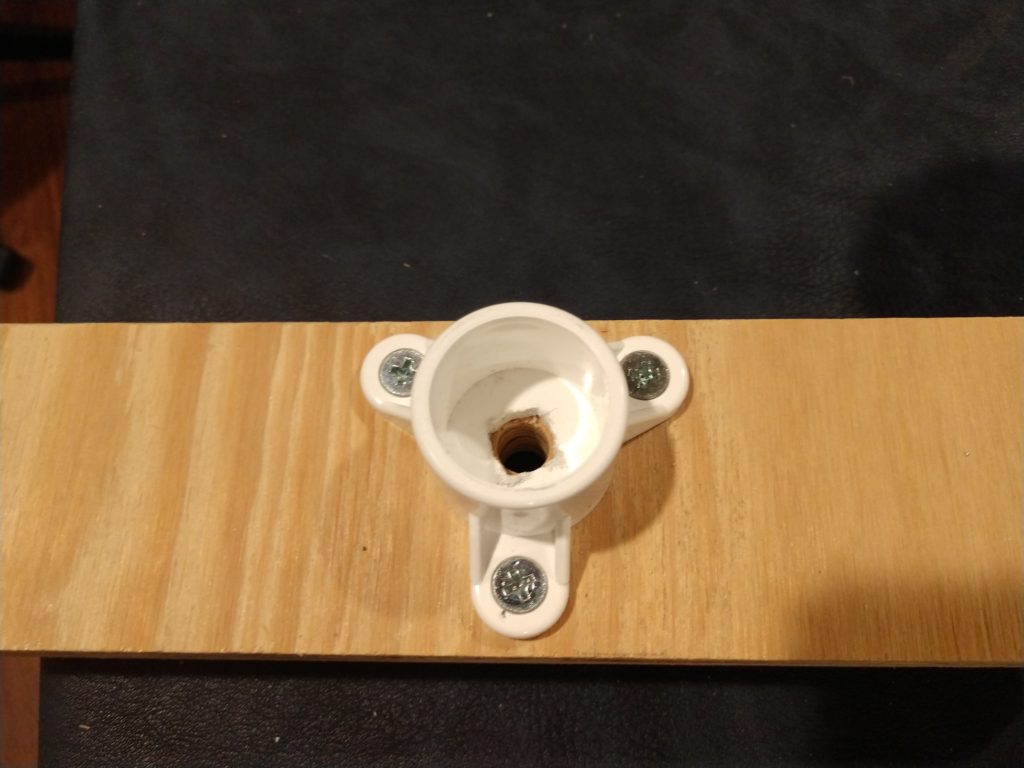
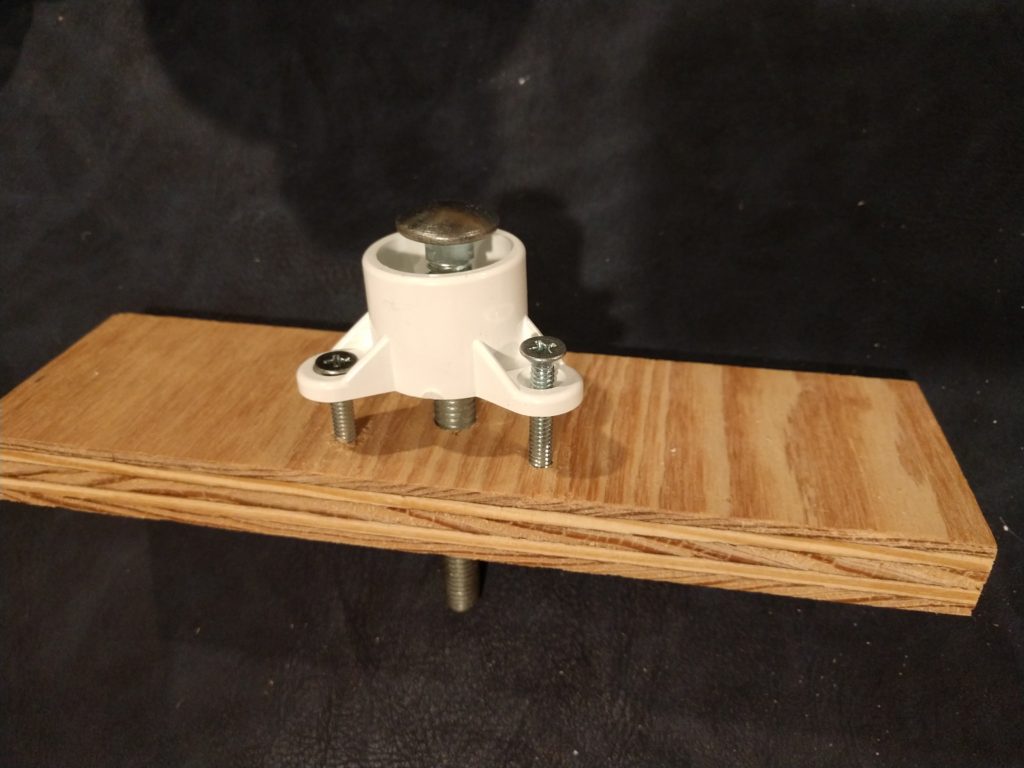
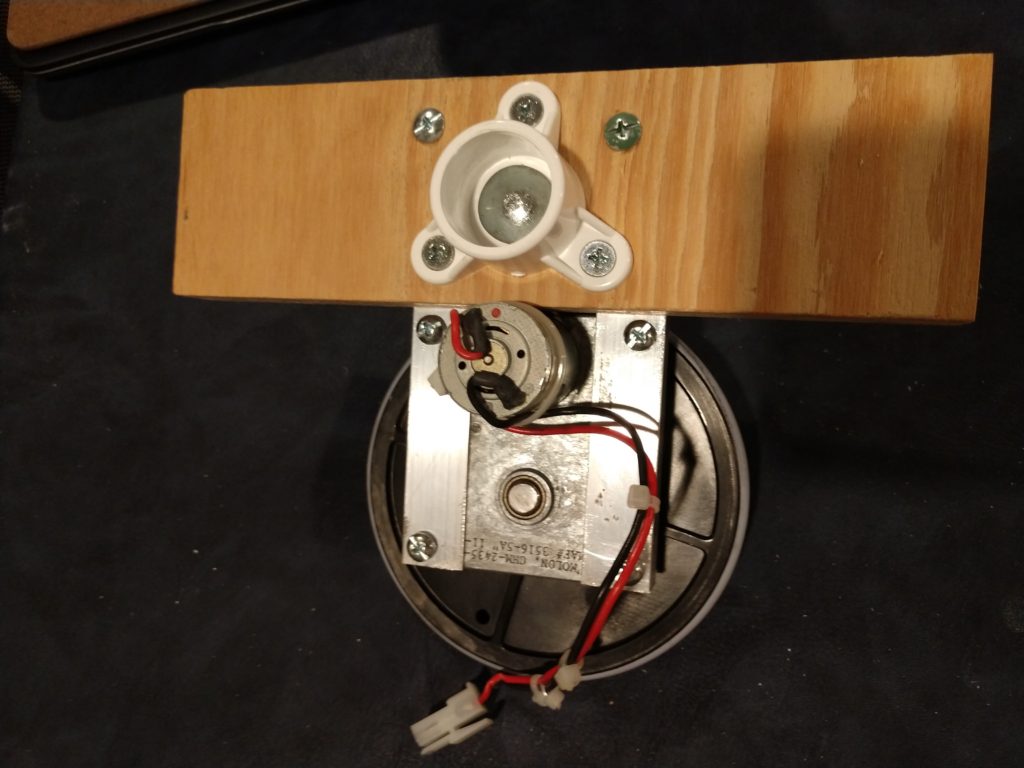
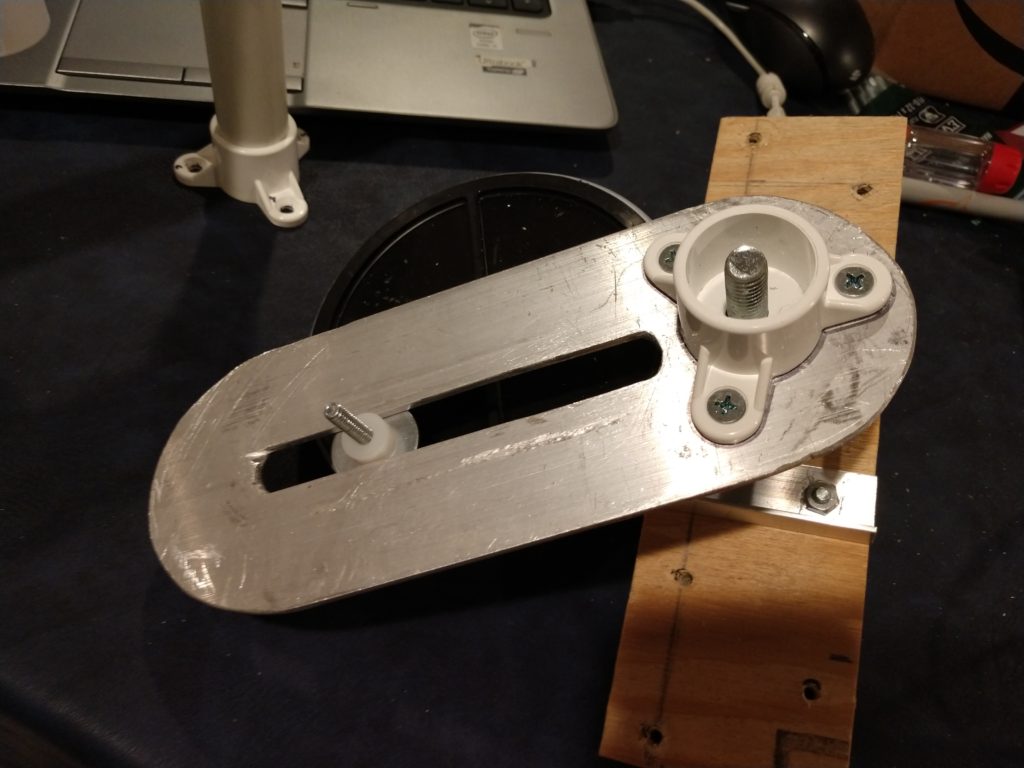
To start the build – I cut off a piece of 3/4″ plywood. After this season, I will likely swap that out for some 3/4″ HDP so it will be completely waterproof. The mounting point is taking advantage of 3/4″ PVC table caps, with a 3/8″ hole in the bottom, that has been squared out to accept the head of the 4″ x 3/8″ carriage bolt. The table cap itself is secured to the plywood with 1 1/4″ bolts through the plywood.
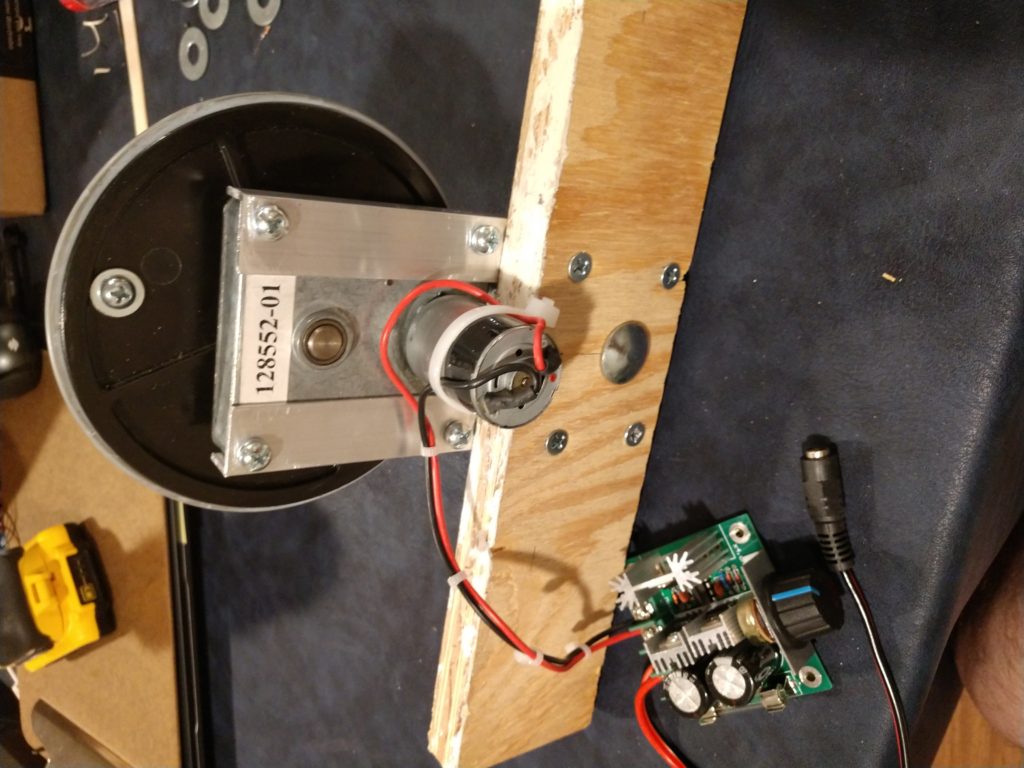
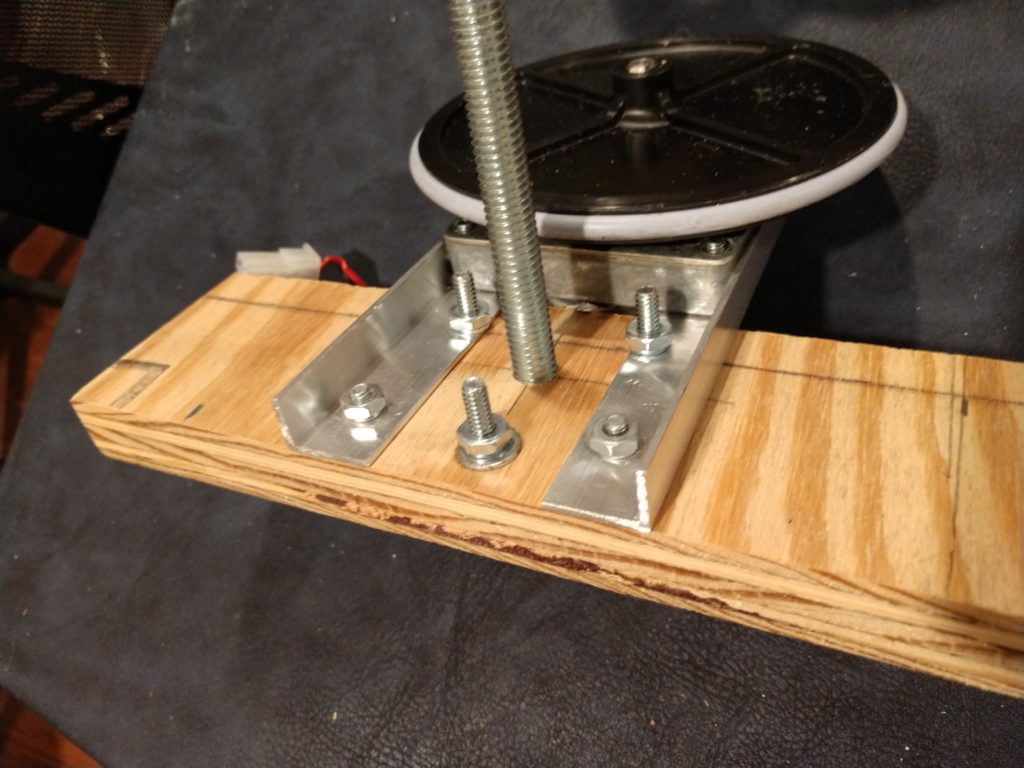
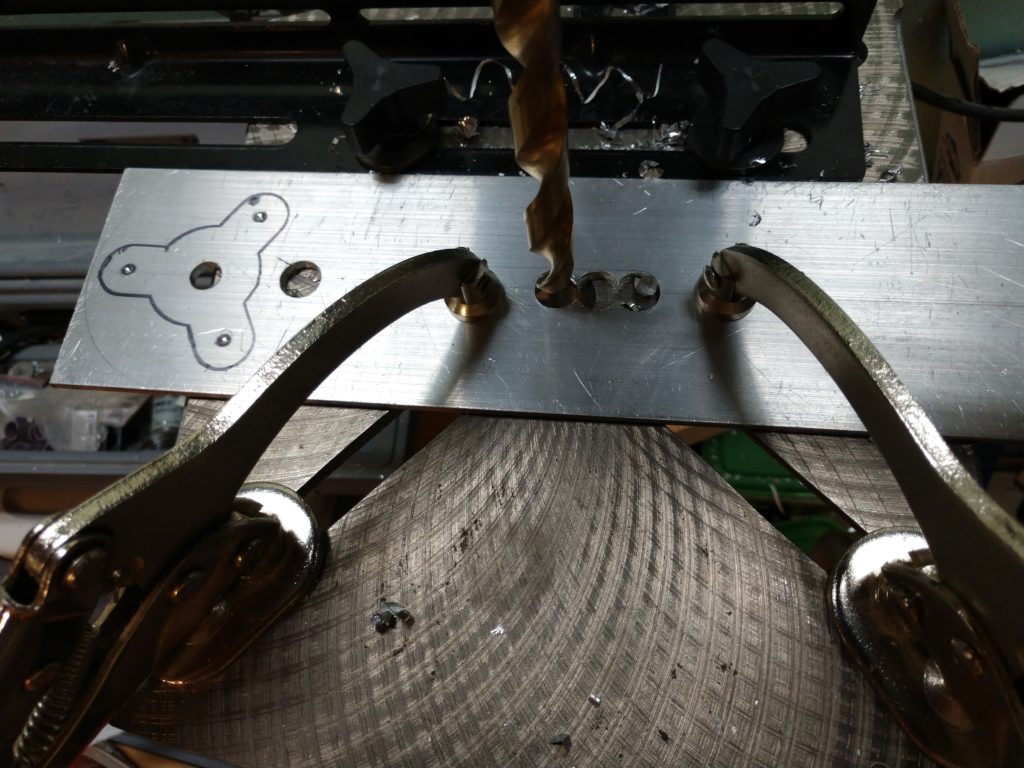
The motor mount takes advantage of the #10 x 32 mounting holes in the motor housing. I took 1/2 x 3/4 x 1/16 aluminum stock. The holes for this mount are centered 1/4 inch from the edge of the housing, and are 2 1/2 inches apart.
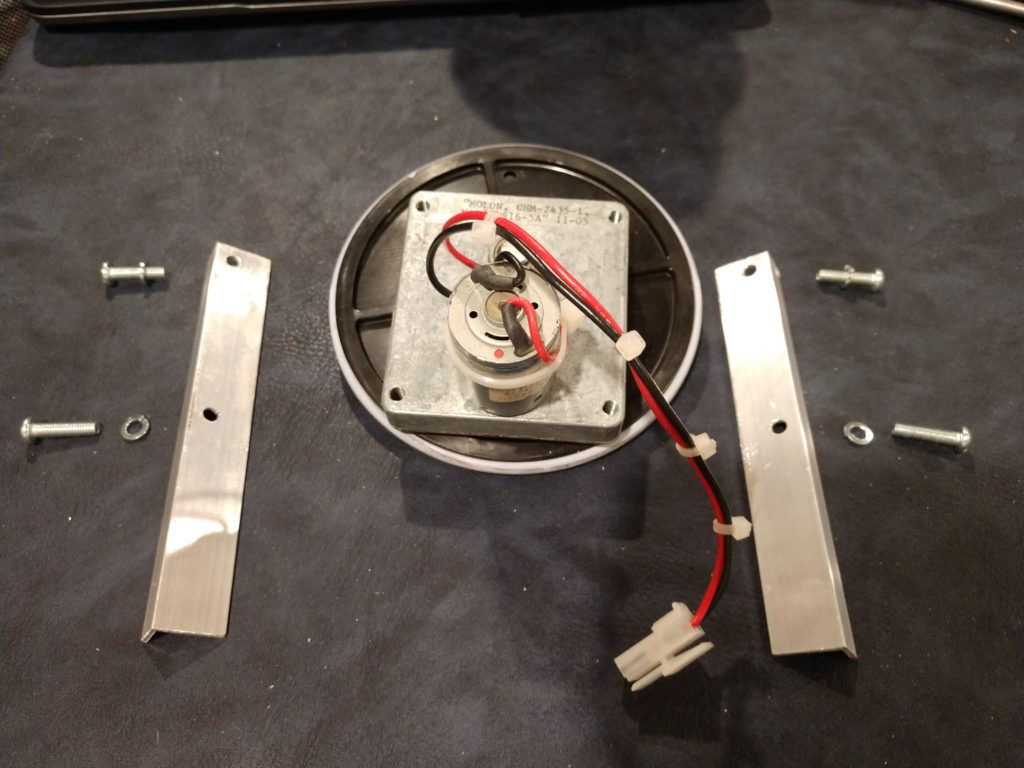
The aluminum is attached to the opposite side of the plywood. Note, I used the bolts from the table cap as as two of the four bolts holding the motor mount to the plywood.
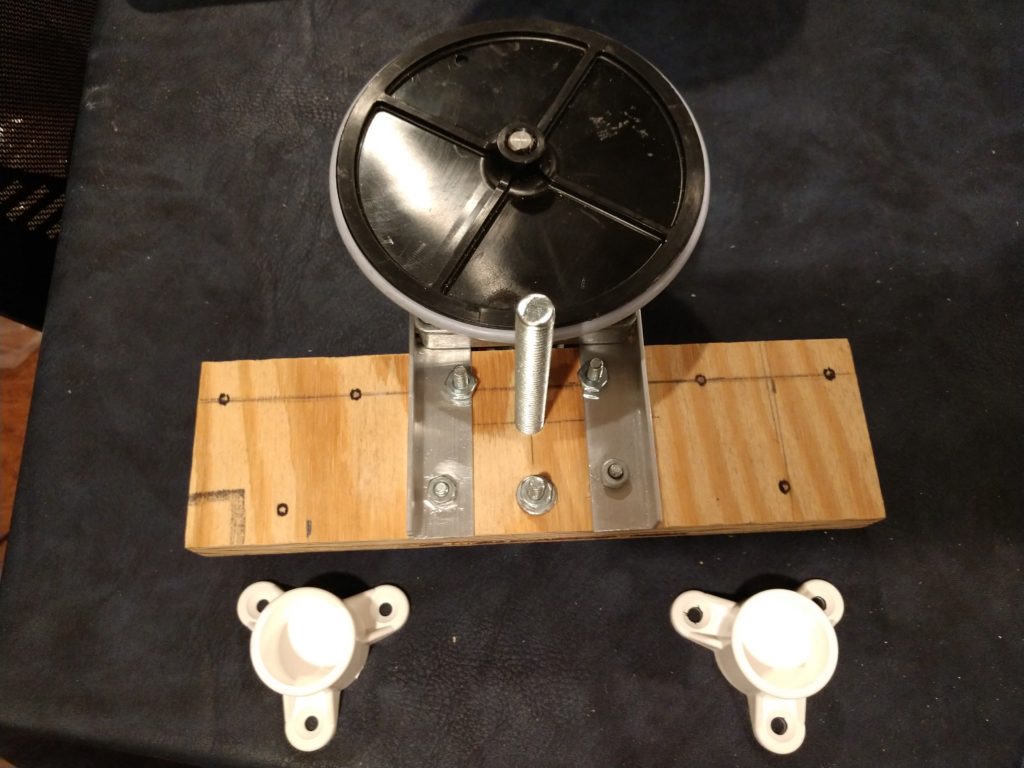
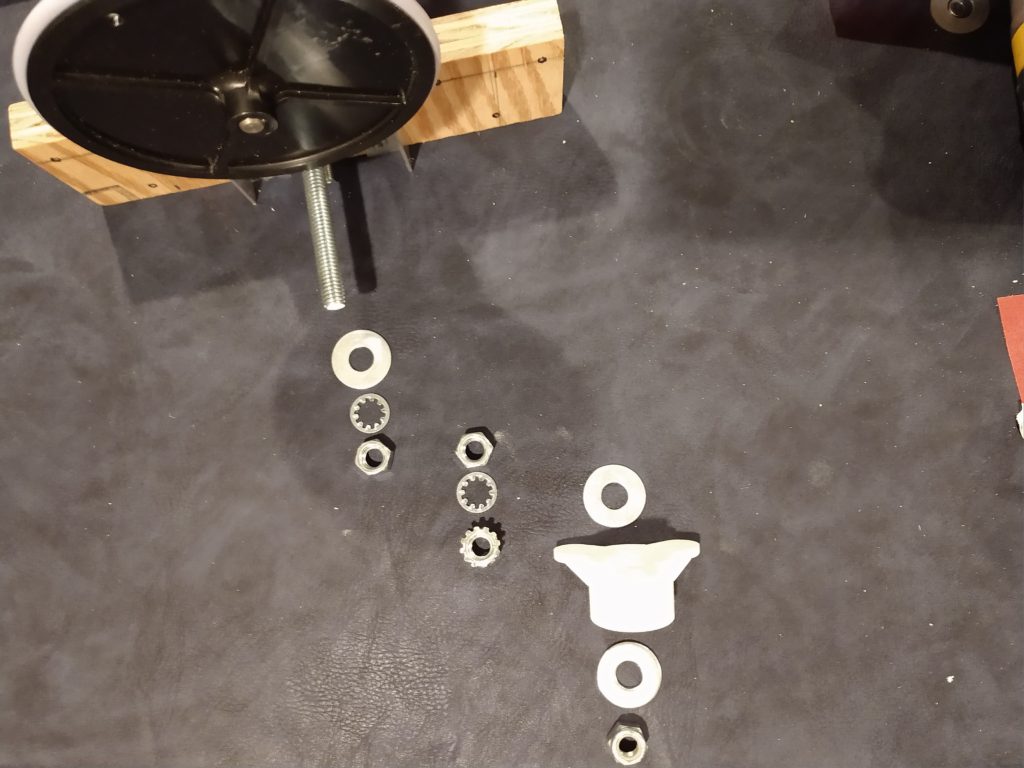
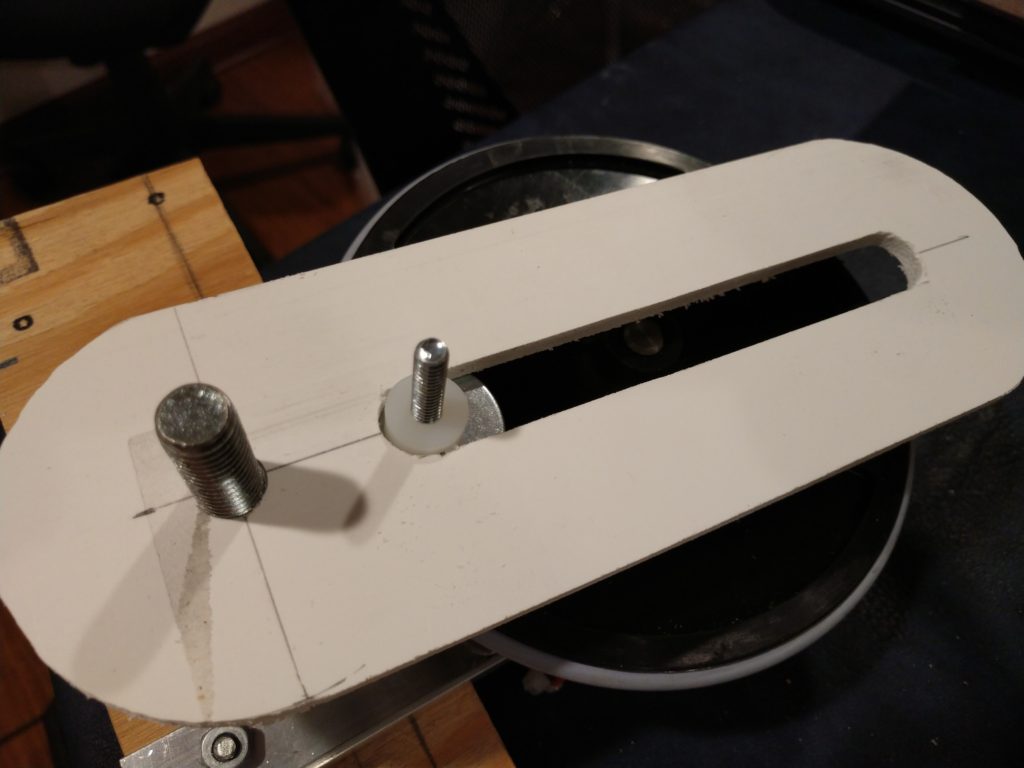
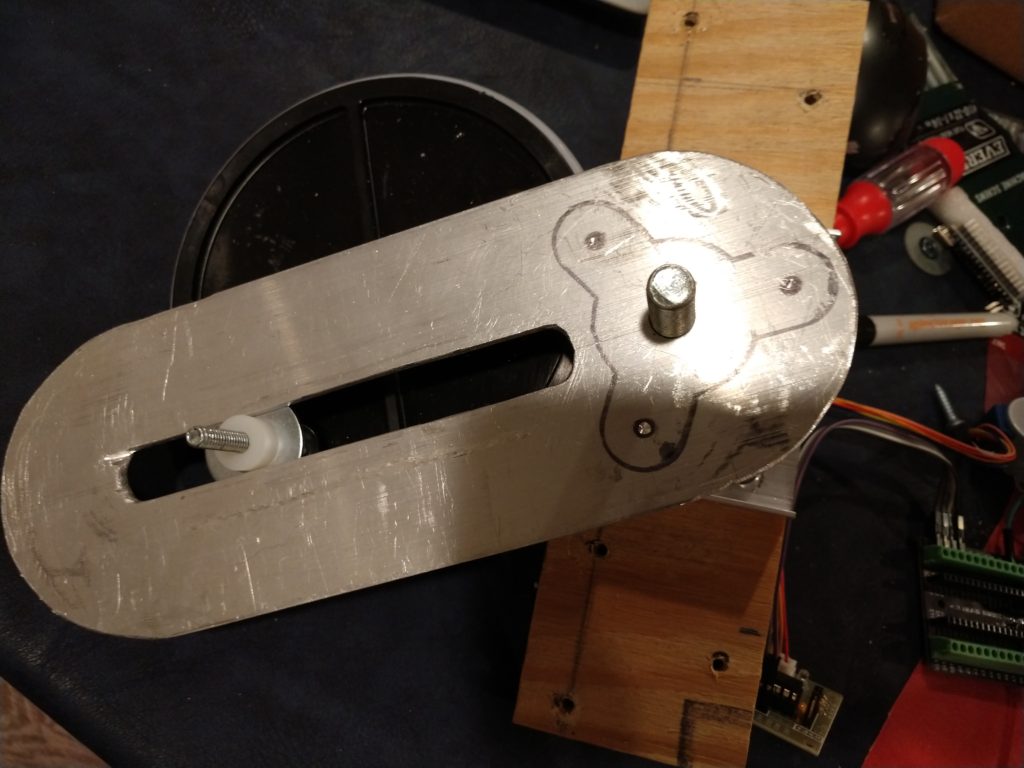
Next we’ll cut put the pin on the rotor. For this I used a #10 2 inch bolt stabilized with washers on either side of the plastic wheel and held in place with lock washers and a nut.
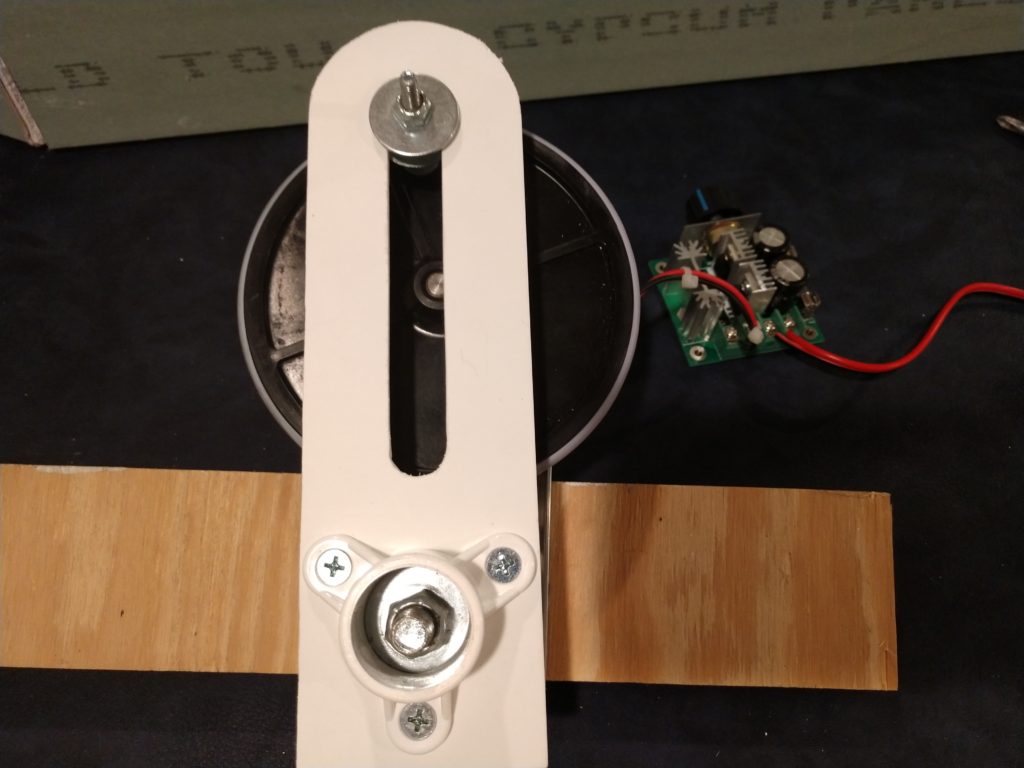
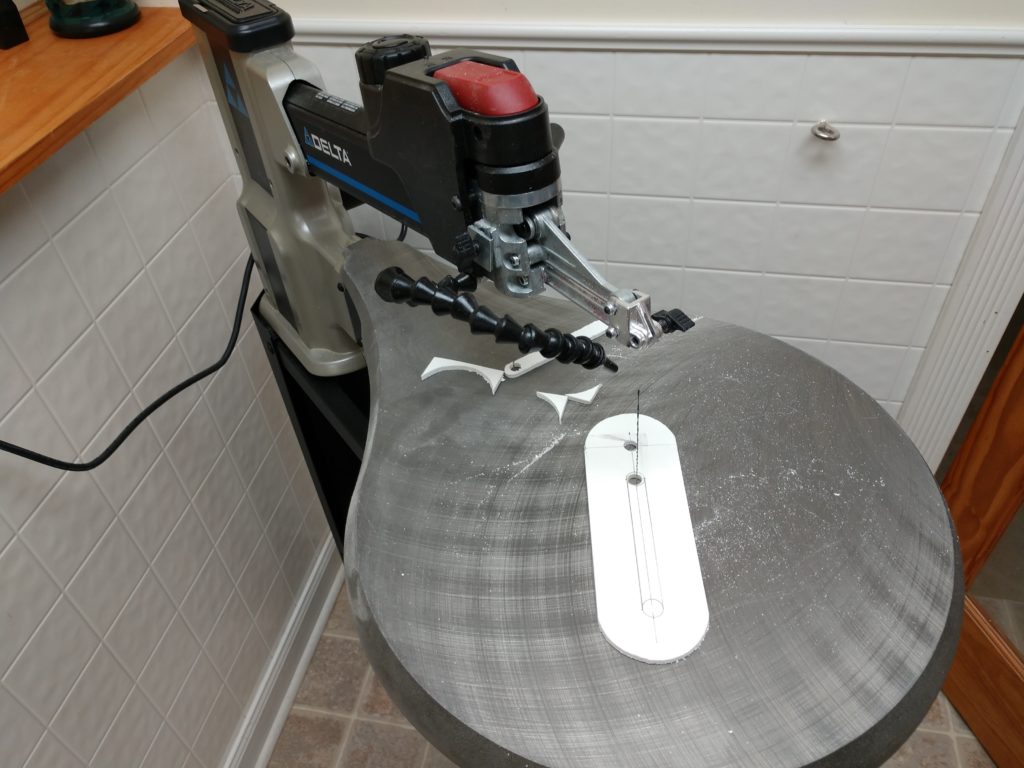
Next we’ll cut the control arm. The material I used for the arm is 3/8″ thick PVC ceiling tile. Honestly, this is the weakest part of the build. I may one day regret this material choice, but it’s relatively cheap ($6 for a 2×2 foot square), and it’s super easy to machine on the scroll saw. (Maybe 2 inch x 1/8 aluminum stock). To determine dimensions of the arm, measure the distance from the center of the carriage bolt to the center of the rotor pin when the rotor is turned as far away from the bolt as possible, then measure when the pin is closest. Mark a 1/2 inch circle around those two point, then round out the control arm. (this is for aesthetics and to minimize the chance of the control arm catching on the rest of the prop. When cutting the center channel, you want it to be SLIGHTLY larger than 1/2″, and you’ll have to smooth the edge.
The control arm has is driven by a 1/2″ nylon spacer sandwiched between two 3/16″ fender washers. Both the pin and the carriage bolt use the same approach (two nuts separated by a lock washer) to lock them to the appropriate height on the pin and the carriage bolt. You want them high enough that they clear the hub of the motor. They should be level with respect to one another.
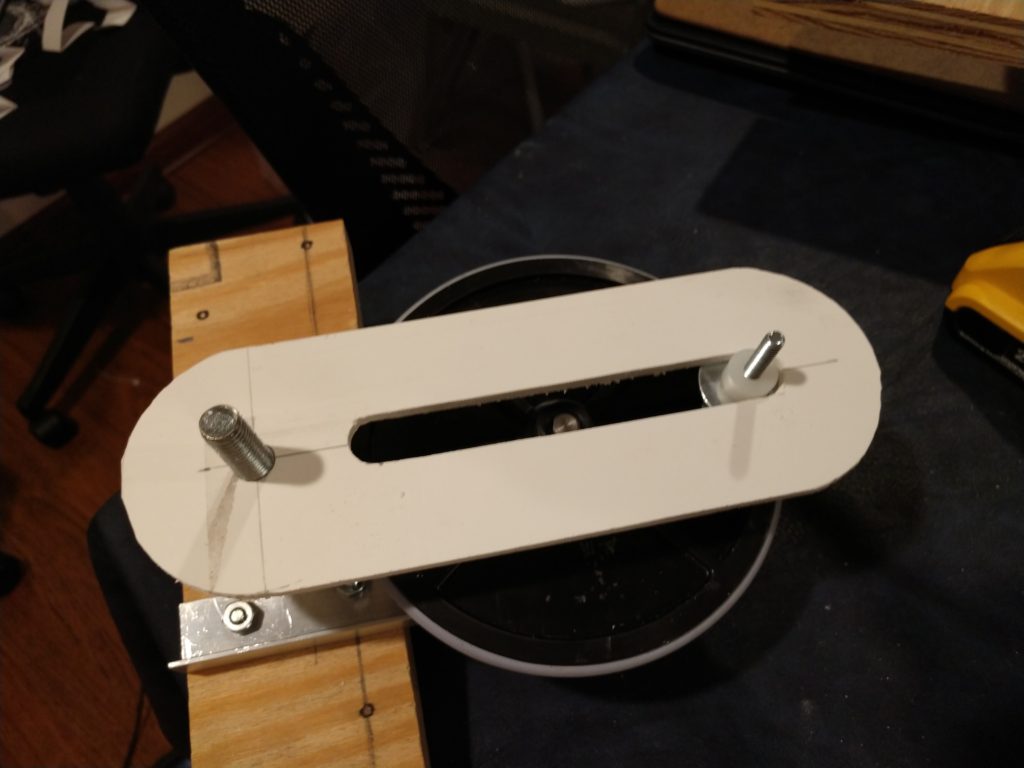

The superstructure over the top of the control arm is important as it bears the load of any lateral stress, protecting the fragile control arm. (Note, we’re not worried about the vertical load. The carriage bolt is bearing the weight from above and transferring it directly to the table cap on the underside of the plywood. ) The bottom table cap is as sturdy as possible. Your weak point here would be if the side of the table cap cracks under a lateral load underneath.
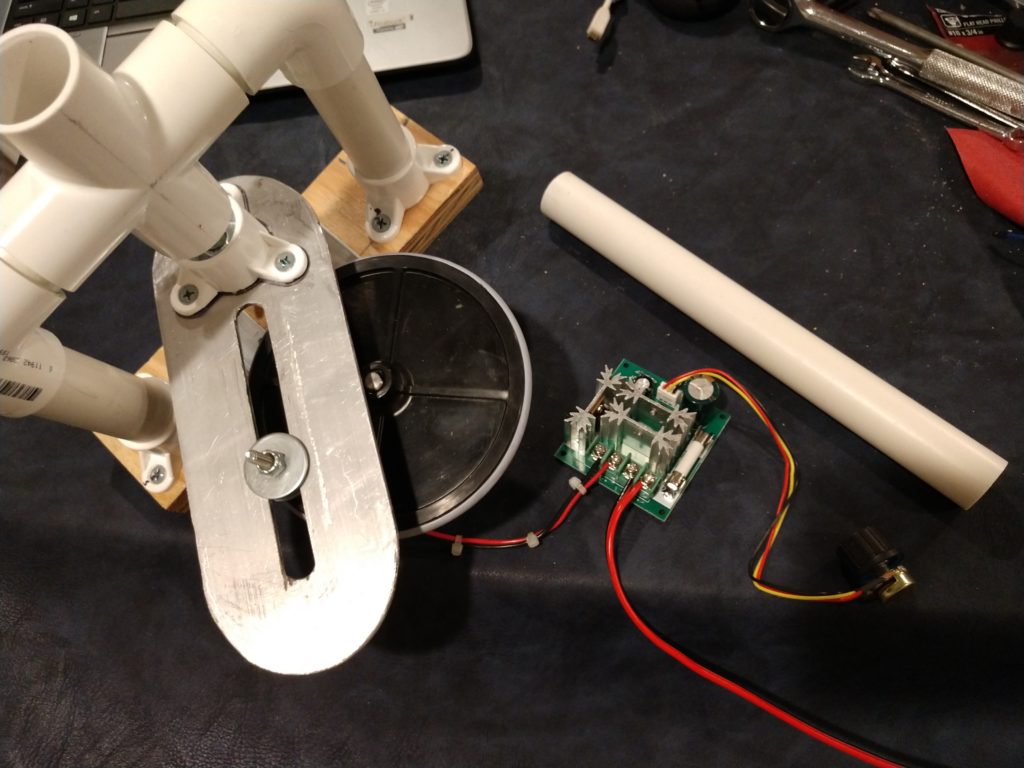
Controlling the lateral load on the top takes a little work. We want to use a cross-tee piece of PVC as a guide. That means that a vertical 3/4″ PVC pipe has to pass through the cross-tee and lock into the table cap above the control arm. But the cross-tee isn’t designed for pass-through, and we in fact want the two sides of the cross-tee to still be able to accept the 3/4″ pipe.
In order to let the upper pipe to pass through the cross-tee, the channel through the PVC must be painstakingly sanded down (I used a 3/4″ dowel rod with 60 grit sandpaper for the grunt work, then finished with a 220 grit. When complete, a 3/4 inch PVC pipe slides effortlessly through the cross-tee — loose enough to spin like a propeller on a shaft. Note – I haven’t found a faster way to do this! If you use any power tools, the heat buildup in the PVC fitting is considerable (and the off-gassing is quite noxious). Plus it deforms the fitting. For this process, slow but steady is the way to go.
This prop controller can be retrofit onto any standing prop with a single 3/4″ spine. Just cut the spine and attach the two halves to the prop controller top and bottom table caps. If you don’t want to add 3 1/2 inches of height to your prop, then you’ll have to cut out a chunk of the spine first.
The motor is wired to a Pulse-Width-Modulator (PWM) the same as in the Mark 1.
I mentioned that the main difference between the Mark 1 and Mark 2 design was the placement of the carriage bolt (main pivot) on the plywood. The closer the carriage bolt is to to the rotor, the more dramatic the return swing will be. Mark 2 traverses from one side to the other relatively slowly, but the return trip is almost twice as fast (more dramatic!). While the Mark 1 return, though still faster, it’s not as obvious. Your call!
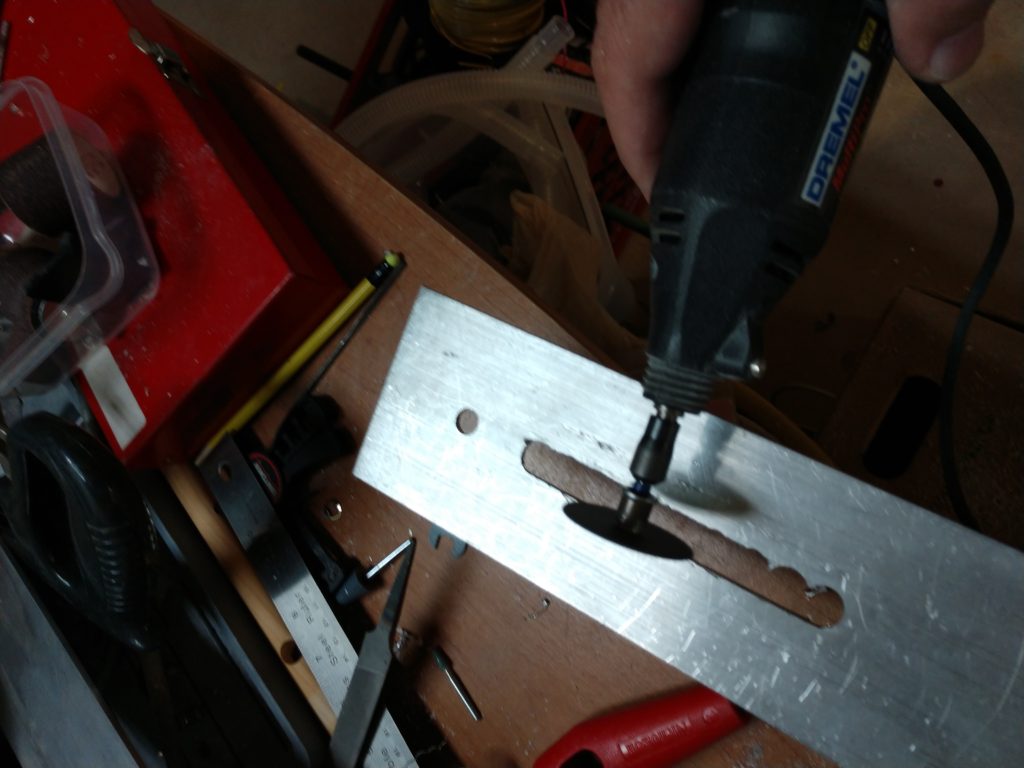
Mark 3 – Aluminum Control Arm
Okay, so on further reflection, the thought of the wind grabbing the character and twisting the pvc control arm was too likely. So I decided to use the PVC control arm as a template and make one out of 3 inch x 1/8″ thick aluminum stock…
The first prop that used this driver is Gary The Revenant
Comments are closed.